cd /etc/yum.repos.d/
cp -f CentOS-Base.repo CentOS-Base.repo.bak
rm -rf CentOS-Base.repo
curl -o /etc/yum.repos.d/CentOS-Base.repo http://mirrors.aliyun.com/repo/Centos-7.repo
yum clean all
yum makecache
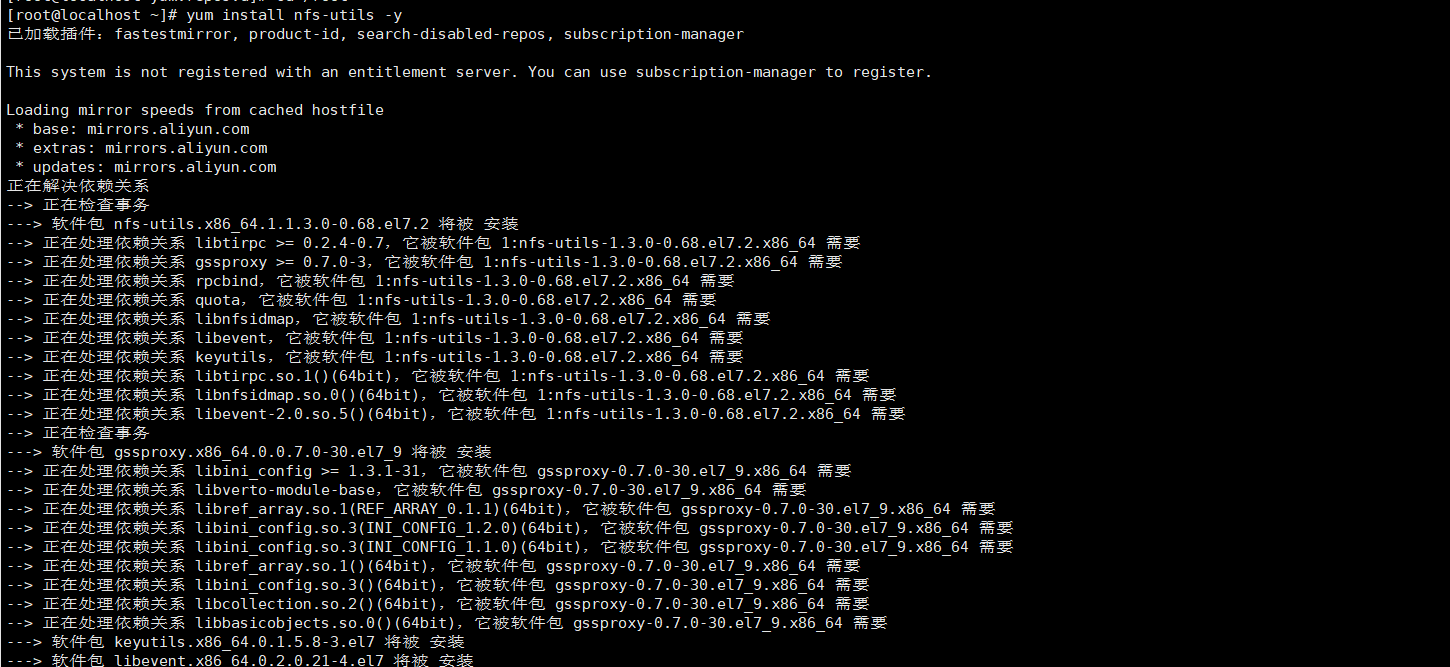
yum install rpcbind nfs-utils -y
service nfs-server stop
service nfs-server start
service nfs-server restart
# 开机启动
systemctl enable nfs-server
systemctl enable rpcbind

ps aux|grep nfs

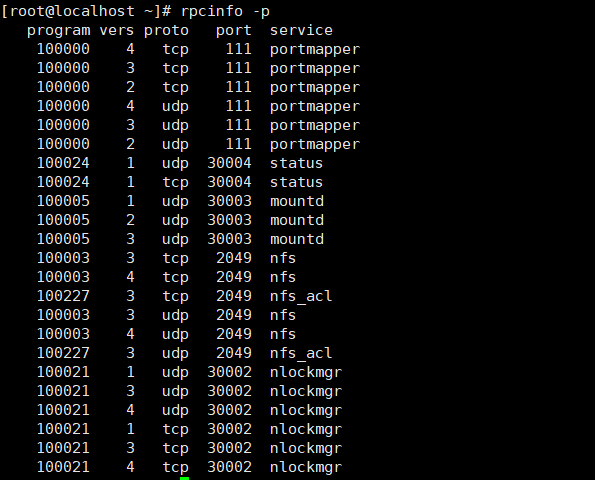
NFS启动时会随机启动多个端口并向RPC注册。
为了设置安全组以及防火墙规则,此时就需要设置NFS固定端口。
NFS服务需要开启 mountd,nfs,nlockmgr,portmapper,rquotad这5个服务.
其中nfs、portmapper的端口是固定的.
另外三个服务的端口是随机分配的.
所以需要给mountd,nlockmgr,rquotad设置固定的端口。
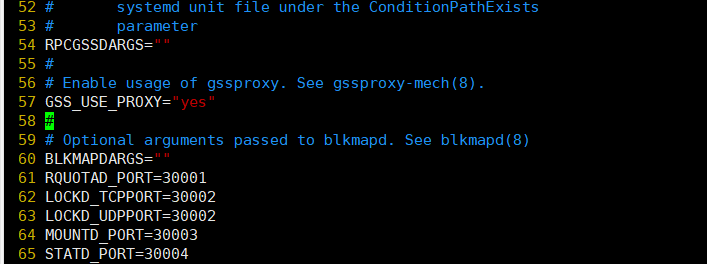
cat >> /etc/sysconfig/nfs << EOF
RQUOTAD_PORT=30001
LOCKD_TCPPORT=30002
LOCKD_UDPPORT=30002
MOUNTD_PORT=30003
STATD_PORT=30004
EOF
systemctl restart rpcbind.service
systemctl restart nfs.service
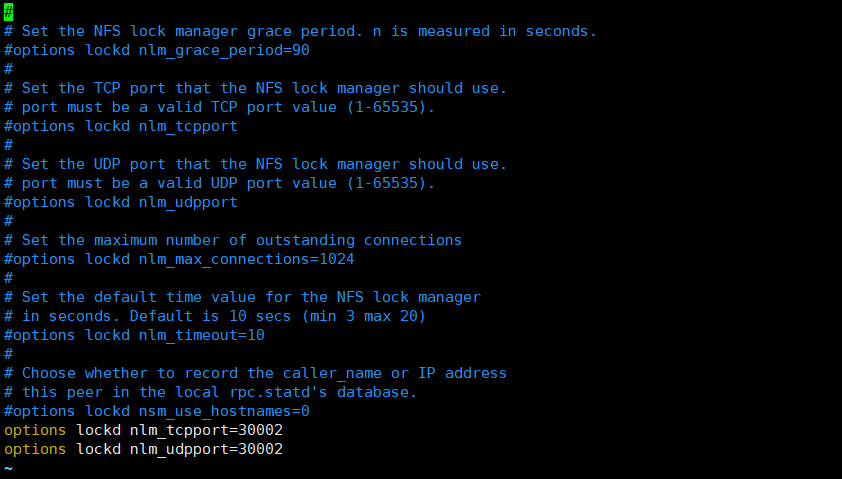
cat >> /etc/modprobe.d/lockd.conf << EOF
options lockd nlm_tcpport=30002
options lockd nlm_udpport=30002
EOF
systemctl restart nfs-config
systemctl restart nfs-idmap
systemctl restart nfs-lock
systemctl restart nfs-server
rpcinfo -p
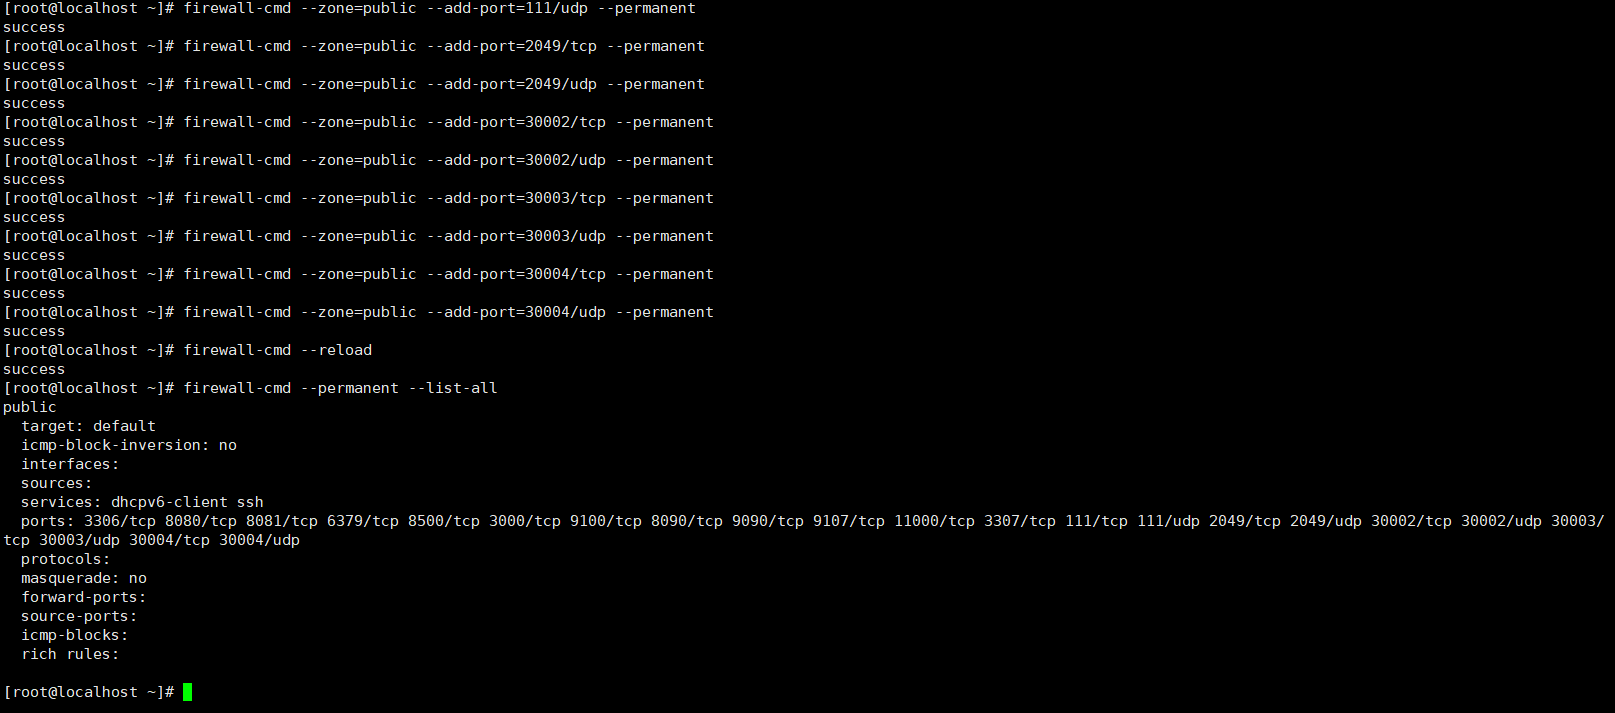
--permanent 表示永久生效,不加该参数重启后失效
firewall-cmd --zone=public --add-port=111/tcp --permanent
firewall-cmd --zone=public --add-port=111/udp --permanent
firewall-cmd --zone=public --add-port=2049/tcp --permanent
firewall-cmd --zone=public --add-port=2049/udp --permanent
firewall-cmd --zone=public --add-port=30002/tcp --permanent
firewall-cmd --zone=public --add-port=30002/udp --permanent
firewall-cmd --zone=public --add-port=30003/tcp --permanent
firewall-cmd --zone=public --add-port=30003/udp --permanent
firewall-cmd --zone=public --add-port=30004/tcp --permanent
firewall-cmd --zone=public --add-port=30004/udp --permanent
firewall-cmd --reload
firewall-cmd --permanent --list-all
mkdir /data
mkdir /data/nfs
vim /etc/exports
cat /etc/exports
service nfs-server restart

/data/nfs 192.168.102.0/24(rw,no_root_squash,async)

#/data/nfs 是共享文件夹的路径,使用绝对路径,需要新建
#192.168.102.0/24 表示允许过来访问的客户机的ip地址网段,*表示不限制ip
#(ro,all_squash,async)表示权限的限制
#ro 表示只读
#rw 表示可读可写
#all_squash:访客时一律被映射为匿名用户(nfsnobody)
#no_all_squash:访客被映射为服务器上相同uid的用户,因此在客户端应建立与服务端uid一致的用户,否则也映射为nfsnobody。root除外,因为root_suqash为默认选项,除非指定了no_root_squash
#root_squash:访客以root用户访问NFS服务端时,被映射为nfsnobody用户
#no_root_squash:访客以root用户访问NFS服务端时,被映射为root用户。以其他用户访问时同样映射为对应uid的用户,因为no_all_squash是默认选项
#sync 同步,同时将数据写入到内存与硬盘中,保证数据不丢失
#async 异步,优先将数据保存到内存,然后再写入磁盘,效率高,但可能丢失数据
cat >> /etc/hosts << EOF
192.168.102.129 nfs.server
EOF

modprobe br_netfilter
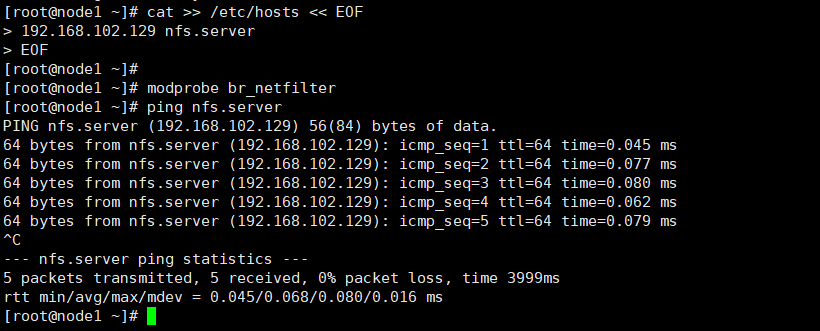
# 必须指定组id和用户id,而且服务端和客户端要一致,否则访客会变成nfsnobody
groupadd -g 6666 nfs
useradd -u 6666 -g nfs nfs
id nfs
vim /etc/idmapd.conf

指定组和用户,注释Domain,改为刚才添加到hosts文件的域名

systemctl restart nfs-config
systemctl restart nfs-idmap
systemctl restart nfs-lock
systemctl restart nfs-server
systemctl restart rpcbind.service
systemctl restart nfs.service
service rpcidmapd restart
cd /data/nfs
vim index.html
cat index.html
#刷新输出文件的列表
exportfs -rv

这里有个问题,那就是/data/nfs文件夹只有服务端的root用户有读写权限,这里我们给文件夹授权,这里配置了norootsquash:访客以root用户访问NFS服务端时,被映射为root用户。以其他用户访问时同样映射为对应uid的用户。
chown -R nfs:nfs /data/nfs
ls -l

yum install rpcbind nfs-utils -y
# 查看nfs服务器上共享输出了哪些文件夹
showmount -e 192.168.102.129

mkdir /data
mkdir /data/nfs
cd /data/nfs/
pwd

mount -o rw -t nfs 192.168.102.129:/data/nfs  /data/nfs
df -Th
#取消挂载
umount -l /data/nfs

cat >> /etc/hosts << EOF
192.168.102.129 nfs.server
EOF

modprobe br_netfilter
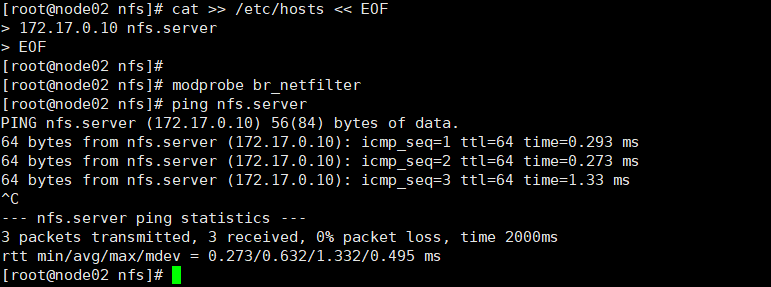
# 必须指定组id和用户id,而且服务端和客户端要一致,否则会变成nfsnobody
groupadd -g 6666 nfs
useradd -u 6666 -g nfs nfs
id nfs
vim /etc/idmapd.conf

指定组和用户,注释Domain,改为刚才添加到hosts文件的域名

systemctl restart nfs-config
systemctl restart nfs-idmap
systemctl restart nfs-lock
systemctl restart nfs-server
systemctl restart rpcbind.service
systemctl restart nfs.service
service rpcidmapd restart
重新挂载文件
umount -l /data/nfs
mount -o rw -t nfs 192.168.102.129:/data/nfs  /data/nfs
df -Th

以root用户创建文件和文件夹
echo "test">>11.txt
mkdir node02
ls -l

可以看到11.txt文件和node02文件夹的所属用户和组都是root
以 nfs 用户创建文件和文件夹
su nfs
echo "test">>22.txt
mkdir node03
ls -l
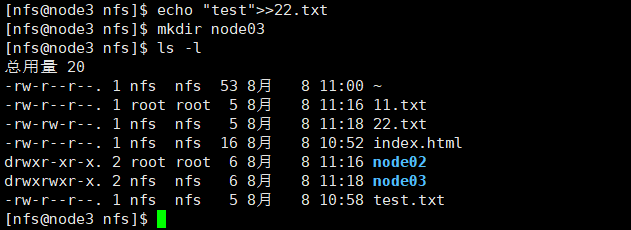
可以看到22.txt文件和node03文件夹的所属用户和组都是nfs