:::info
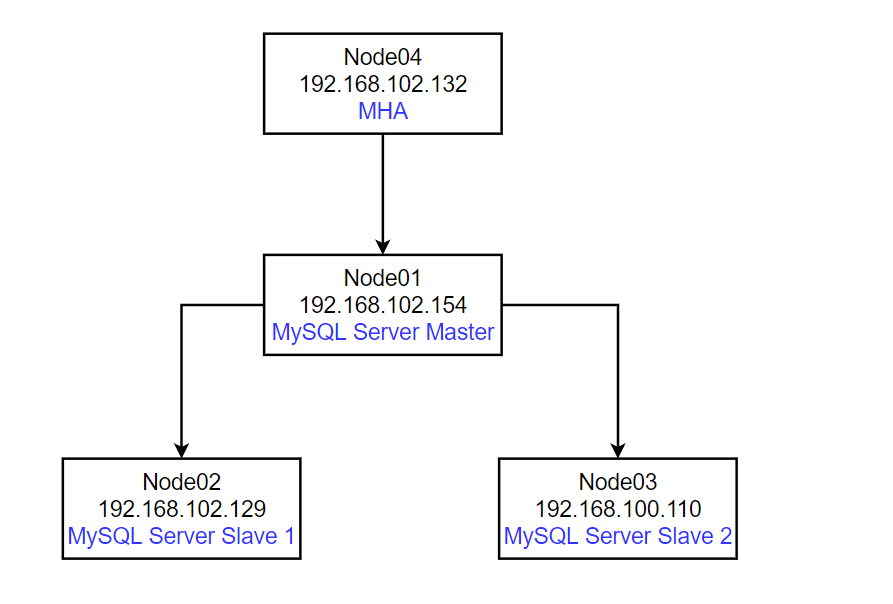
MHA 是一套相对成熟的 MySQL 高可用方案,能做到在 0~30s 内自动完成数据库的故障切换操作,在 master 服务器不宕机的情况下,基本能保证数据的一致性。
简单理解:
master slave1 slave2
当 master down 掉的时候,slave1 顶替成为新的 master,原来的 master 成为新的 slave。
一直都保持一主多从,也就是一直都是一个主,多个从。
如果有多个主的话,会抢占资源。
:::
卸载自带的 MariaDB
rpm -qa | grep mariadb
rpm -e --nodeps mariadb-libs-5.5.68-1.el7.x86_64

创建 mysql 组和 mysql 用户
groupadd mysql
useradd -r -g mysql mysql
cat /etc/group | grep mysql
cat /etc/passwd |grep mysql

下载 MySQL 安装包
cd /usr/local
wget https://downloads.mysql.com/archives/get/p/23/file/mysql-5.7.36-el7-x86_64.tar.gz
解压安装包
tar -zxvf mysql-5.7.36-el7-x86_64.tar.gz
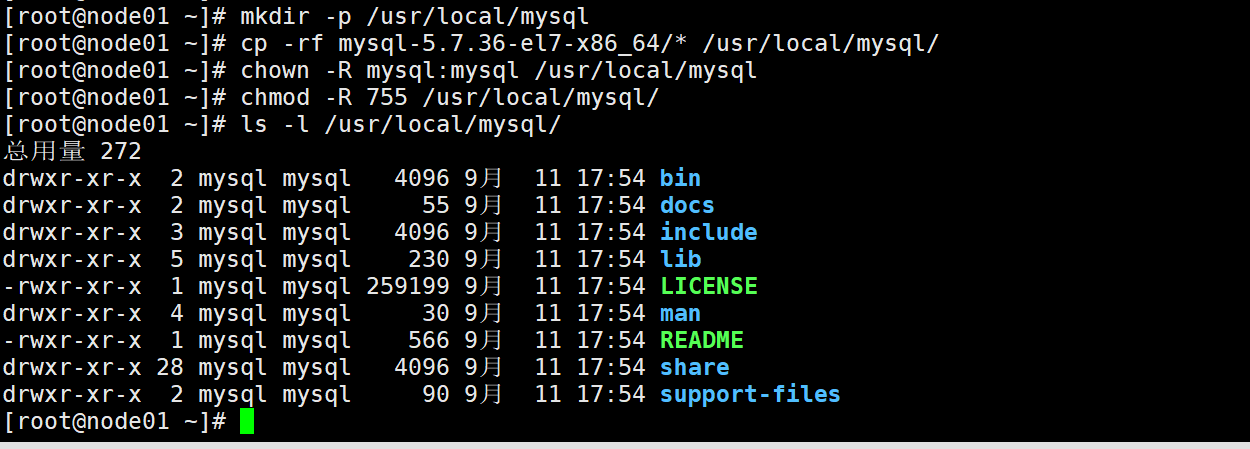
解压后修改目录名称为mysql
mv -f mysql-5.7.36-el7-x86_64 mysql
chown -R mysql:mysql /usr/local/mysql
chmod -R 755 /usr/local/mysql/
ls -l /usr/local/mysql/
rm -rf mysql-5.7.36-el7-x86_64
创建相关目录及文件夹
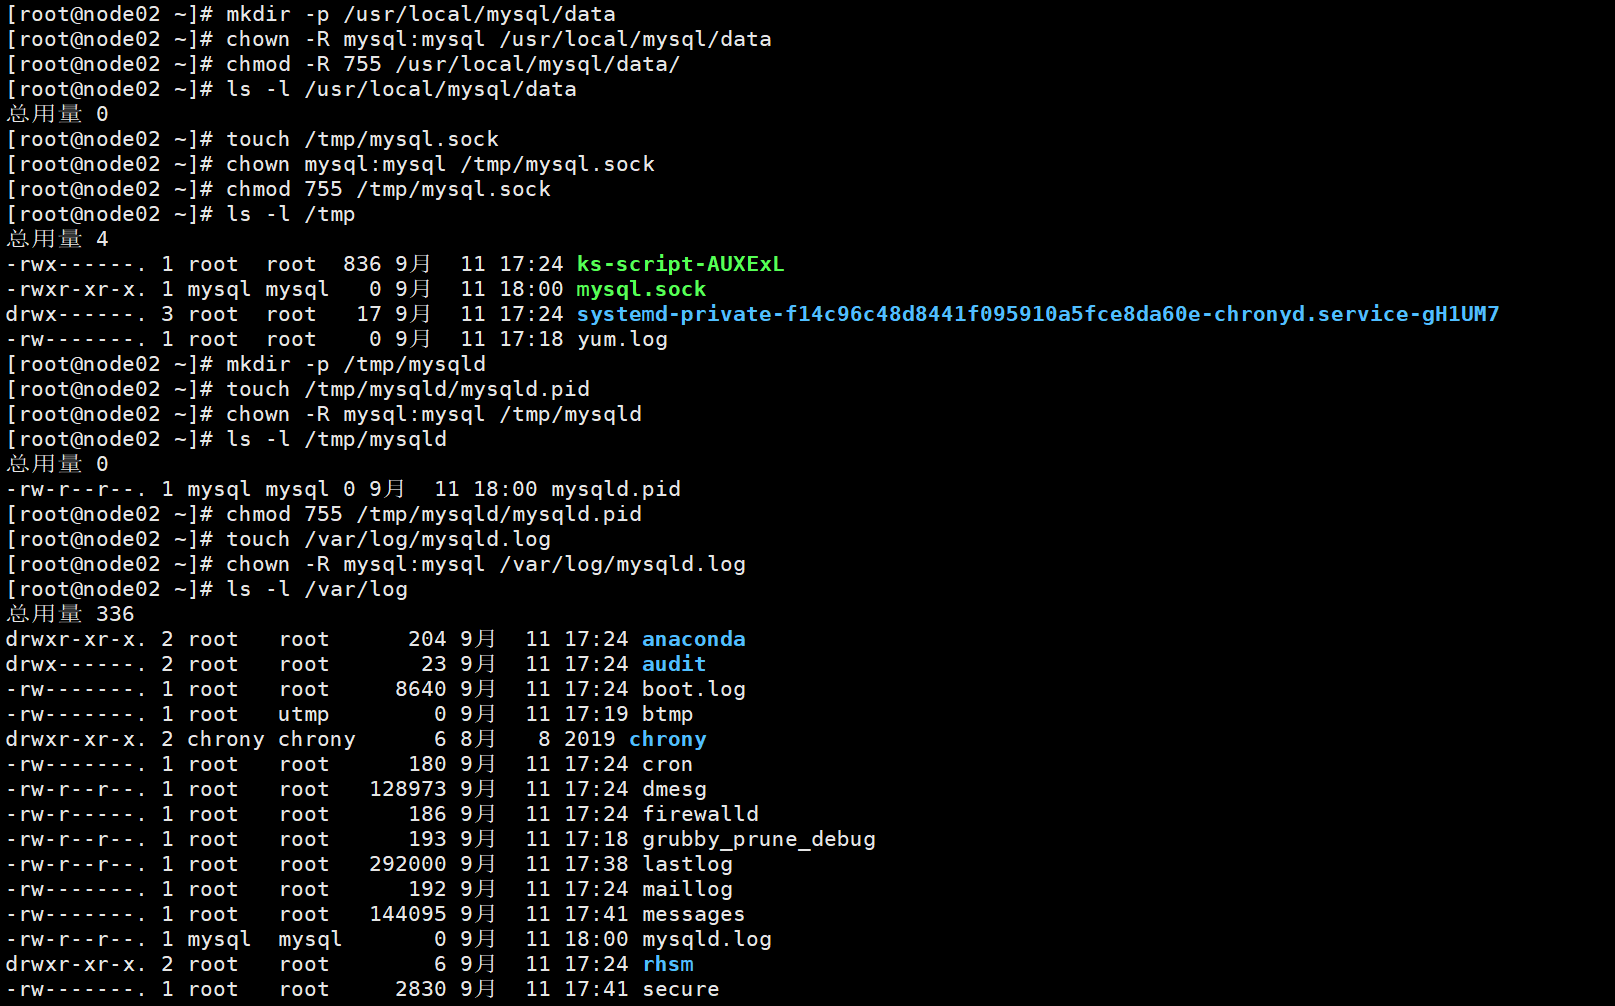
mkdir -p /usr/local/mysql/data
chown -R mysql:mysql /usr/local/mysql/data
chmod -R 755 /usr/local/mysql/data/
ls -l /usr/local/mysql/data
touch /tmp/mysql.sock
chown mysql:mysql /tmp/mysql.sock
chmod 755 /tmp/mysql.sock
ls -l /tmp
mkdir -p /tmp/mysqld
touch /tmp/mysqld/mysqld.pid
chown -R mysql:mysql /tmp/mysqld
ls -l /tmp/mysqld
chmod 755 /tmp/mysqld/mysqld.pid
touch /var/log/mysqld.log
chown -R mysql:mysql /var/log/mysqld.log
ls -l /var/log
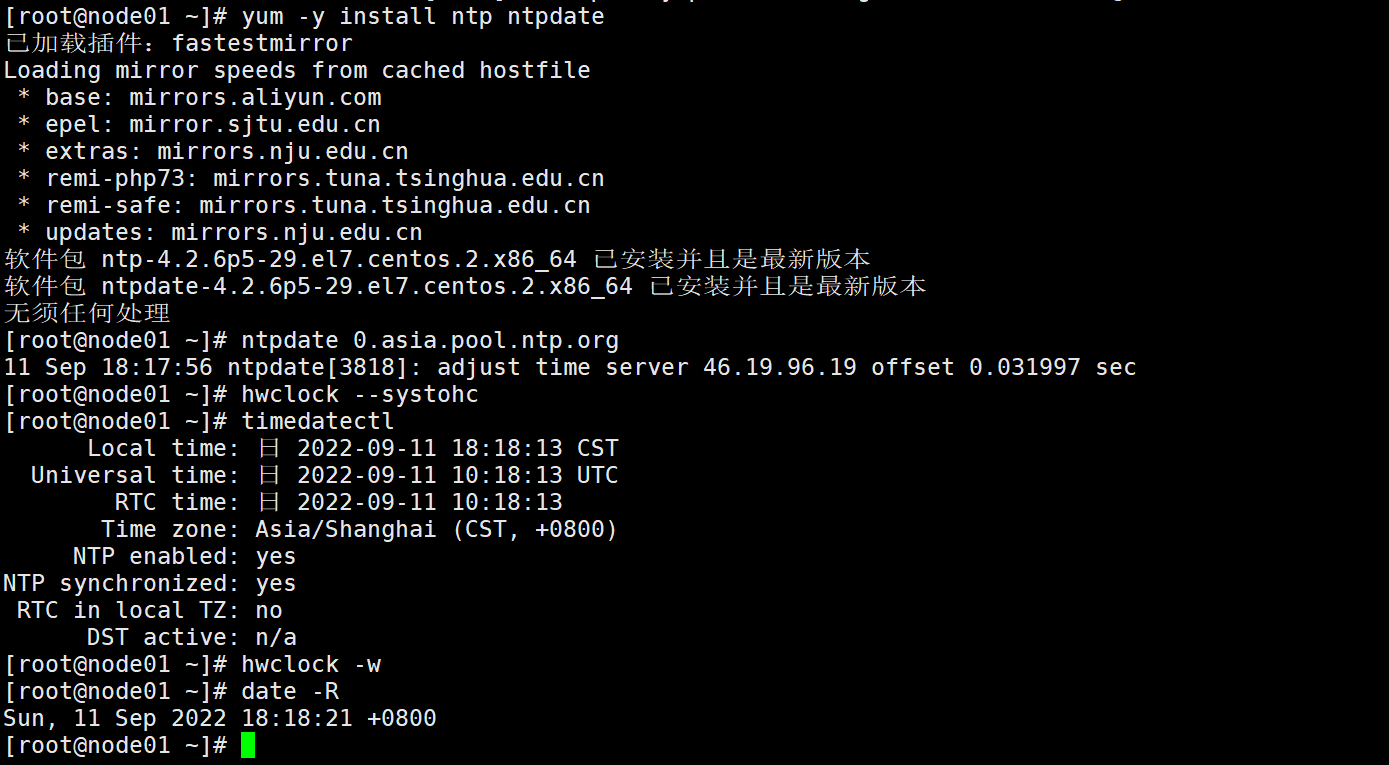
这里主要就是通过时间服务器对系统时间进行同步,所以0.asia.pool.ntp.org并不是固定的,可以选择time.nist.gov、time.nuri.net、0.asia.pool.ntp.org、1.asia.pool.ntp.org、2.asia.pool.ntp.org、3.asia.pool.ntp.org中任意一个,只要保证可用就OK。
yum -y install ntp ntpdate
# 设置系统时区为 中国/上海
timedatectl set-timezone Asia/Shanghai
ntpdate 0.asia.pool.ntp.org
# 将系统时间写入硬件时间
hwclock --systohc
timedatectl
# 强制系统时间写入CMOS中防止重启失效
hwclock -w
初始化数据库
/usr/local/mysql/bin/mysqld --initialize --user=mysql --basedir=/usr/local/mysql --datadir=/usr/local/mysql/data >> /var/log/mysqld_init.log 2>&1
查看密码
cat /var/log/mysqld_init.log | grep 'password'
将 mysql 的 bin 目录加入 PATH 环境变量(这一步是必须的)
vim ~/.bash_profile
export PATH=$PATH:/usr/local/mysql/bin
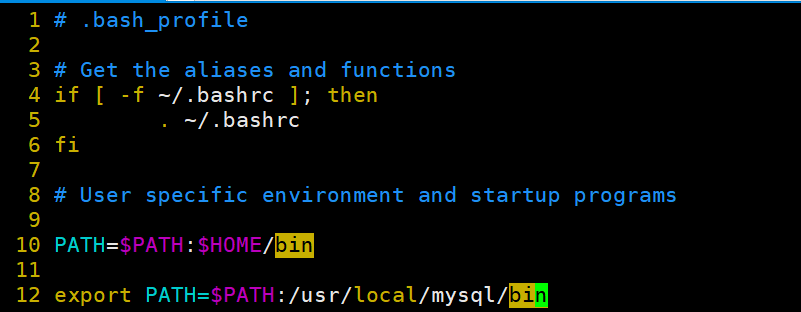
执行下面的命令是修改的内容立即生效
source ~/.bash_profile
vim /etc/my.cnf
[mysqld]
# 每个节点的 serverid都不一样
server-id=1
# 必须开启 gtid 模式
gtid_mode=ON
enforce_gtid_consistency=ON
log_slave_updates=ON

basedir=/usr/local/mysql
datadir=/usr/local/mysql/data
socket=/tmp/mysql.sock
user=mysql
port = 3306
lower_case_table_names=1
max_allowed_packet=400M
log_bin_trust_function_creators=1
max_connections=1000
default-time_zone = '+8:00'
explicit_defaults_for_timestamp=1
sql_mode='STRICT_TRANS_TABLES,NO_ZERO_IN_DATE,NO_ZERO_DATE,ERROR_FOR_DIVISION_BY_ZERO,NO_AUTO_CREATE_USER,NO_ENGINE_SUBSTITUTION'

innodb_buffer_pool_size=1G
innodb_log_file_size=256M
innodb_flush_log_at_trx_commit=1
innodb_flush_method=O_DIRECT
innodb_autoinc_lock_mode=2
innodb_flush_log_at_trx_commit=0

slave_skip_errors=1396
skip-name-resolve

#binlog
expire_logs_days=7
log-bin=mysql-bin
binlog-format=ROW

#指定默认引擎
disabled_storage_engines=MyISAM,BLACKHOLE,FEDERATED,CSV,ARCHIVE
default_storage_engine=innodb

symbolic-links=0
init_connect='SET collation_connection = utf8_unicode_ci'
init_connect='SET NAMES utf8'
character-set-server=utf8
collation-server=utf8_unicode_ci
skip-character-set-client-handshake

[mysql_safe]
log-error=/var/log/mysqld.log
pid-file=/tmp/mysqld/mysqld.pid

[client]
default-character-set=utf8

[mysql]
default-character-set=utf8
启动 Master
# 后台启动
nohup mysqld --defaults-file=/etc/my.cnf --user=mysql >> /var/log/mysqld_run.log 2>&1 &
ps -ef | grep mysqld

cat /var/log/mysqld_init.log | grep 'password'
mysql -uroot -p'x-9zoetUWW.h'
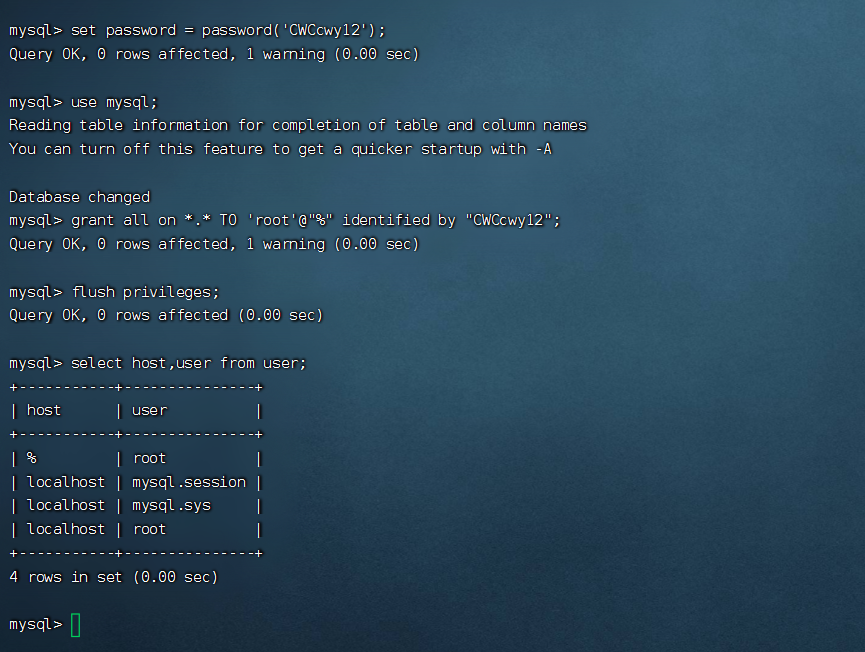
#修改root用户登陆密码
set password = password('CWCcwy12');
use mysql;

#给予所有权限的创建
grant all on *.* TO 'root'@"%" identified by "CWCcwy12";
#刷新权限
flush privileges;

select host,user from user;
#退出登陆
quit;
show master status;

vim /etc/my.cnf
[mysqld]
server-id=2
gtid_mode=ON
enforce_gtid_consistency=ON
log_slave_updates=ON

basedir=/usr/local/mysql
datadir=/usr/local/mysql/data
socket=/tmp/mysql.sock
user=mysql
port = 3306
lower_case_table_names=1
max_allowed_packet=400M
log_bin_trust_function_creators=1
max_connections=1000
default-time_zone = '+8:00'
explicit_defaults_for_timestamp=1
sql_mode='STRICT_TRANS_TABLES,NO_ZERO_IN_DATE,NO_ZERO_DATE,ERROR_FOR_DIVISION_BY_ZERO,NO_AUTO_CREATE_USER,NO_ENGINE_SUBSTITUTION'

innodb_buffer_pool_size=1G
innodb_log_file_size=256M
innodb_flush_log_at_trx_commit=1
innodb_flush_method=O_DIRECT
innodb_autoinc_lock_mode=2
innodb_flush_log_at_trx_commit=0

slave_skip_errors=1396
skip-name-resolve

#binlog
expire_logs_days=7
log-bin=mysql-bin
binlog-format=ROW

#指定默认引擎
disabled_storage_engines=MyISAM,BLACKHOLE,FEDERATED,CSV,ARCHIVE
default_storage_engine=innodb

symbolic-links=0
init_connect='SET collation_connection = utf8_unicode_ci'
init_connect='SET NAMES utf8'
character-set-server=utf8
collation-server=utf8_unicode_ci
skip-character-set-client-handshake

[mysql_safe]
log-error=/var/log/mysqld.log
pid-file=/tmp/mysqld/mysqld.pid

[client]
default-character-set=utf8

[mysql]
default-character-set=utf8
启动 Slave 1
nohup mysqld --defaults-file=/etc/my.cnf --user=mysql >> /var/log/mysqld_run.log 2>&1 &

ps -ef | grep mysqld

cat /var/log/mysqld_init.log | grep 'password'
mysql -uroot -p'7O4WxDb%xm<b'
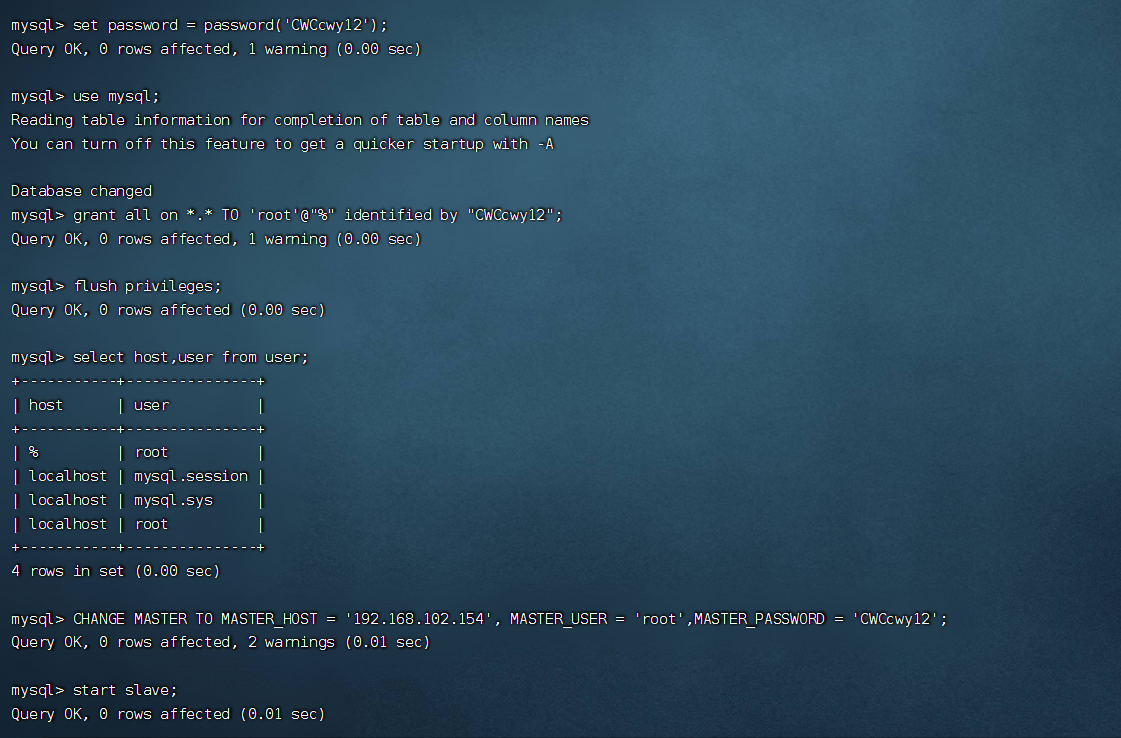
#修改root用户登陆密码
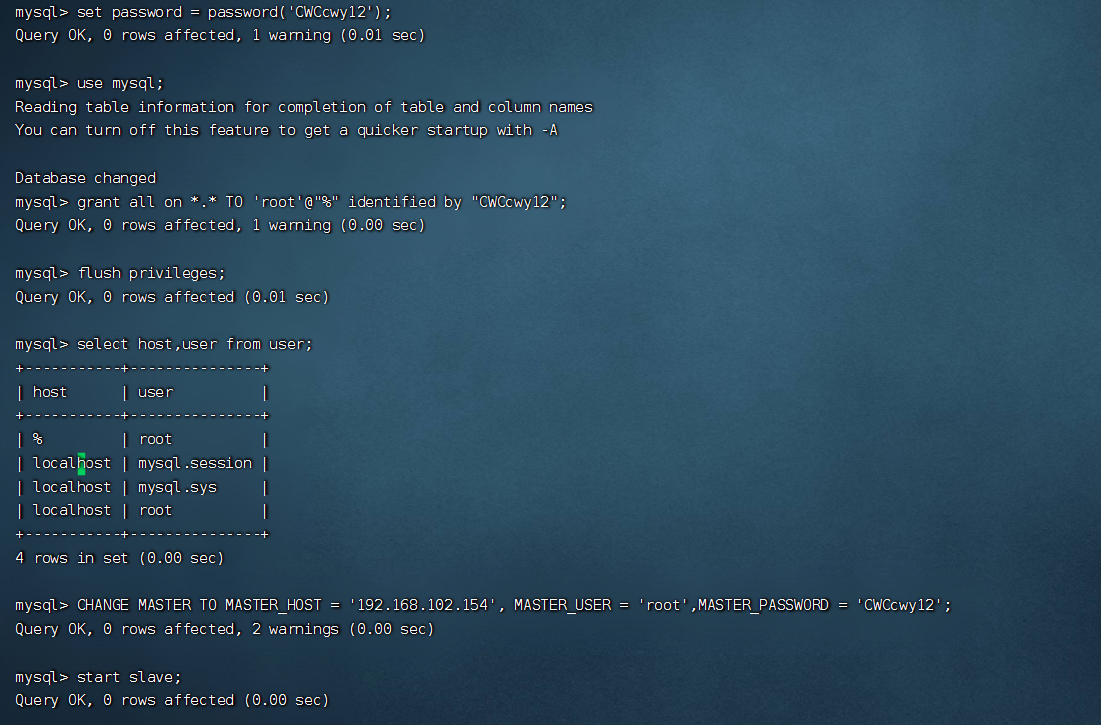
set password = password('CWCcwy12');
use mysql;

#给予所有权限的创建
grant all on *.* TO 'root'@"%" identified by "CWCcwy12";
#刷新权限
flush privileges;
select host,user from user;

#修改master信息
CHANGE MASTER TO MASTER_HOST = '192.168.102.154', MASTER_USER = 'root',MASTER_PASSWORD = 'CWCcwy12';
start slave;
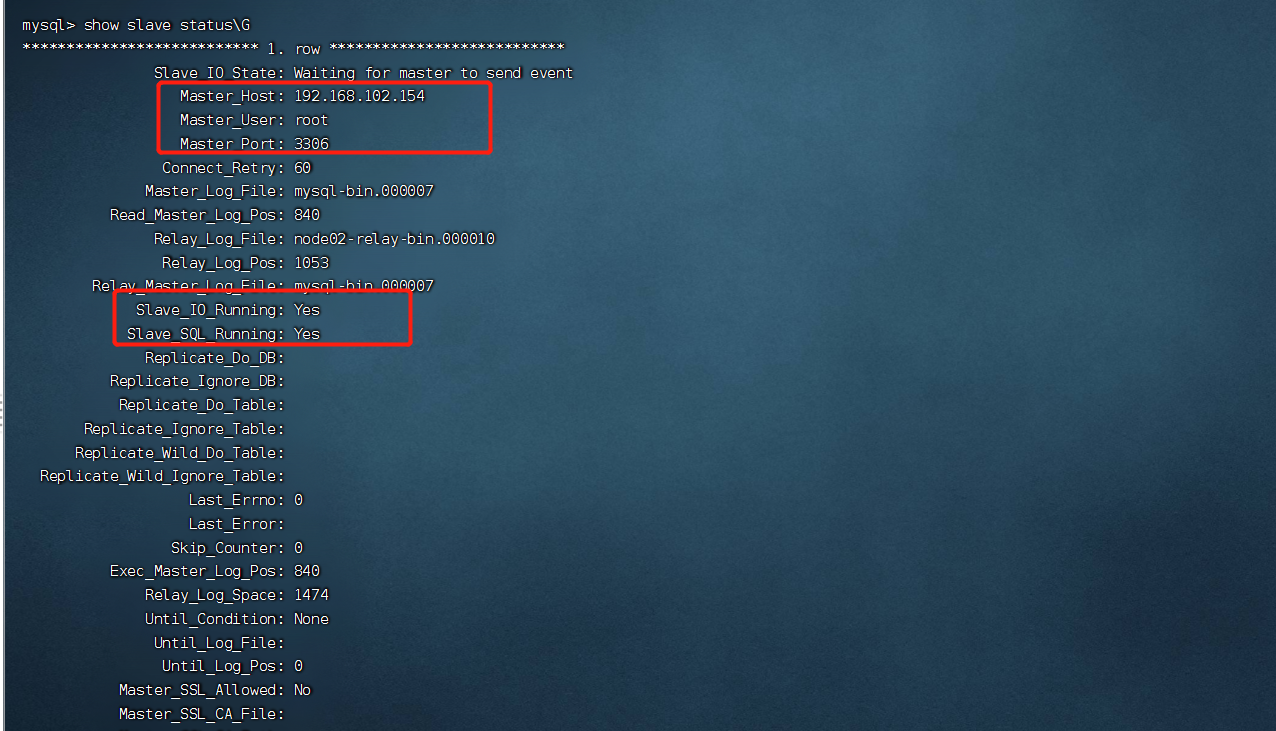
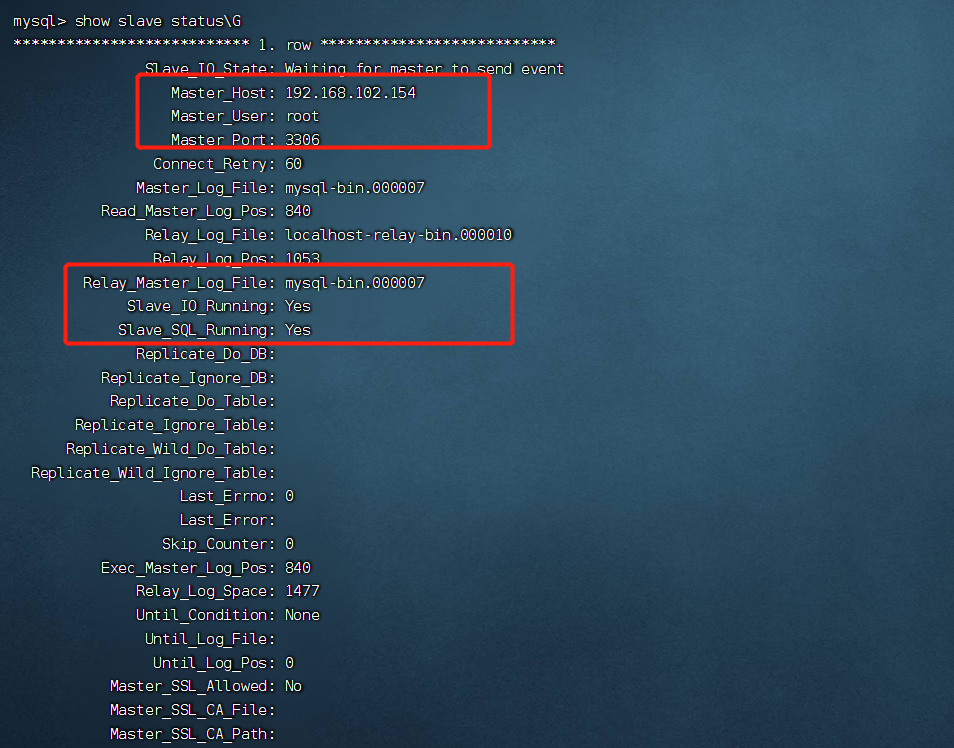
##可以看到master为server1的IP
show slave status\G
vim /etc/my.cnf
[mysqld]
server-id=3
gtid_mode=ON
enforce_gtid_consistency=ON
log_slave_updates=ON

basedir=/usr/local/mysql
datadir=/usr/local/mysql/data
socket=/tmp/mysql.sock
user=mysql
port = 3306
lower_case_table_names=1
max_allowed_packet=400M
log_bin_trust_function_creators=1
max_connections=1000
default-time_zone = '+8:00'
explicit_defaults_for_timestamp=1
sql_mode='STRICT_TRANS_TABLES,NO_ZERO_IN_DATE,NO_ZERO_DATE,ERROR_FOR_DIVISION_BY_ZERO,NO_AUTO_CREATE_USER,NO_ENGINE_SUBSTITUTION'

innodb_buffer_pool_size=1G
innodb_log_file_size=256M
innodb_flush_log_at_trx_commit=1
innodb_flush_method=O_DIRECT
innodb_autoinc_lock_mode=2
innodb_flush_log_at_trx_commit=0

slave_skip_errors=1396
skip-name-resolve

#binlog
expire_logs_days=7
log-bin=mysql-bin
binlog-format=ROW

#指定默认引擎
disabled_storage_engines=MyISAM,BLACKHOLE,FEDERATED,CSV,ARCHIVE
default_storage_engine=innodb

symbolic-links=0
init_connect='SET collation_connection = utf8_unicode_ci'
init_connect='SET NAMES utf8'
character-set-server=utf8
collation-server=utf8_unicode_ci
skip-character-set-client-handshake

[mysql_safe]
log-error=/var/log/mysqld.log
pid-file=/tmp/mysqld/mysqld.pid

[client]
default-character-set=utf8

[mysql]
default-character-set=utf8
启动 Slave 2
nohup mysqld --defaults-file=/etc/my.cnf --user=mysql >> /var/log/mysqld_run.log 2>&1 &
ps -ef | grep mysqld

cat /var/log/mysqld_init.log | grep 'password'
mysql -uroot -p'>bl+q),%)8(G'
#修改root用户登陆密码
set password = password('CWCcwy12');
use mysql;

#给予所有权限的创建
grant all on *.* TO 'root'@"%" identified by "CWCcwy12";
#刷新权限
flush privileges;
select host,user from user;

#修改master信息
CHANGE MASTER TO MASTER_HOST = '192.168.102.154', MASTER_USER = 'root',MASTER_PASSWORD = 'CWCcwy12';
start slave;
##可以看到master为server1的IP
show slave status\G
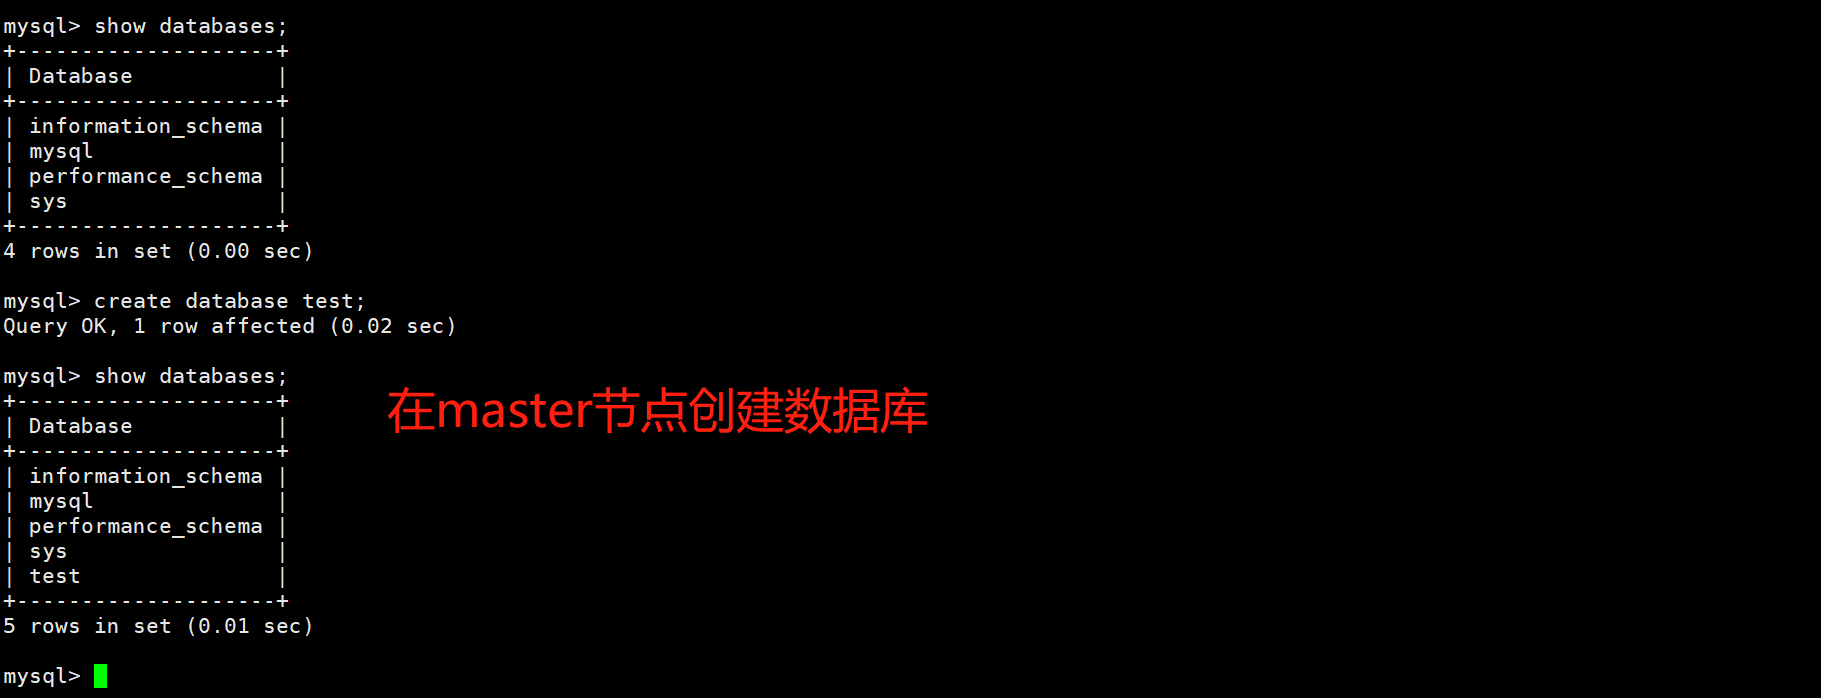
show databases;
create database test;
use test;
show databases;


配置高可用(再开一台server4来做master,因为高可用一般都是奇数个节点,因为如果master挂了,其他从节点需要投票选举一个新的master,偶数节点可能出现投票数相同)。
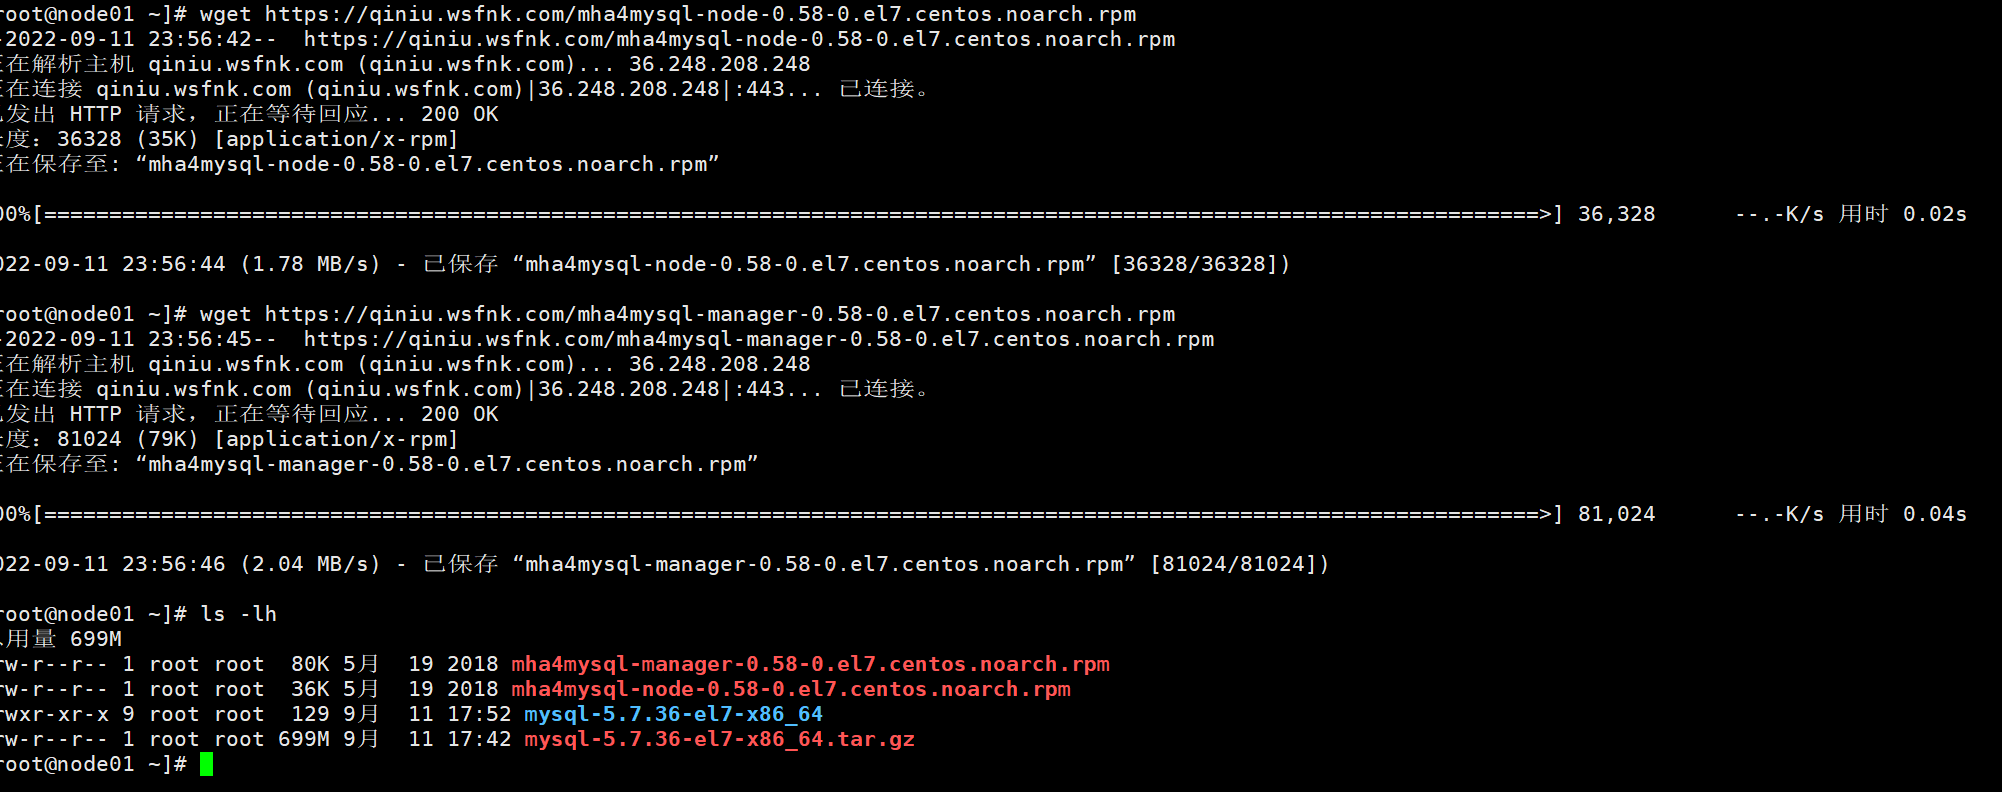
wget https://qiniu.wsfnk.com/mha4mysql-node-0.58-0.el7.centos.noarch.rpm
wget https://qiniu.wsfnk.com/mha4mysql-manager-0.58-0.el7.centos.noarch.rpm
yum install -y mha4mysql-manager-0.58-0.el7.centos.noarch.rpm mha4mysql-node-0.58-0.el7.centos.noarch.rpm
如果出现以下错误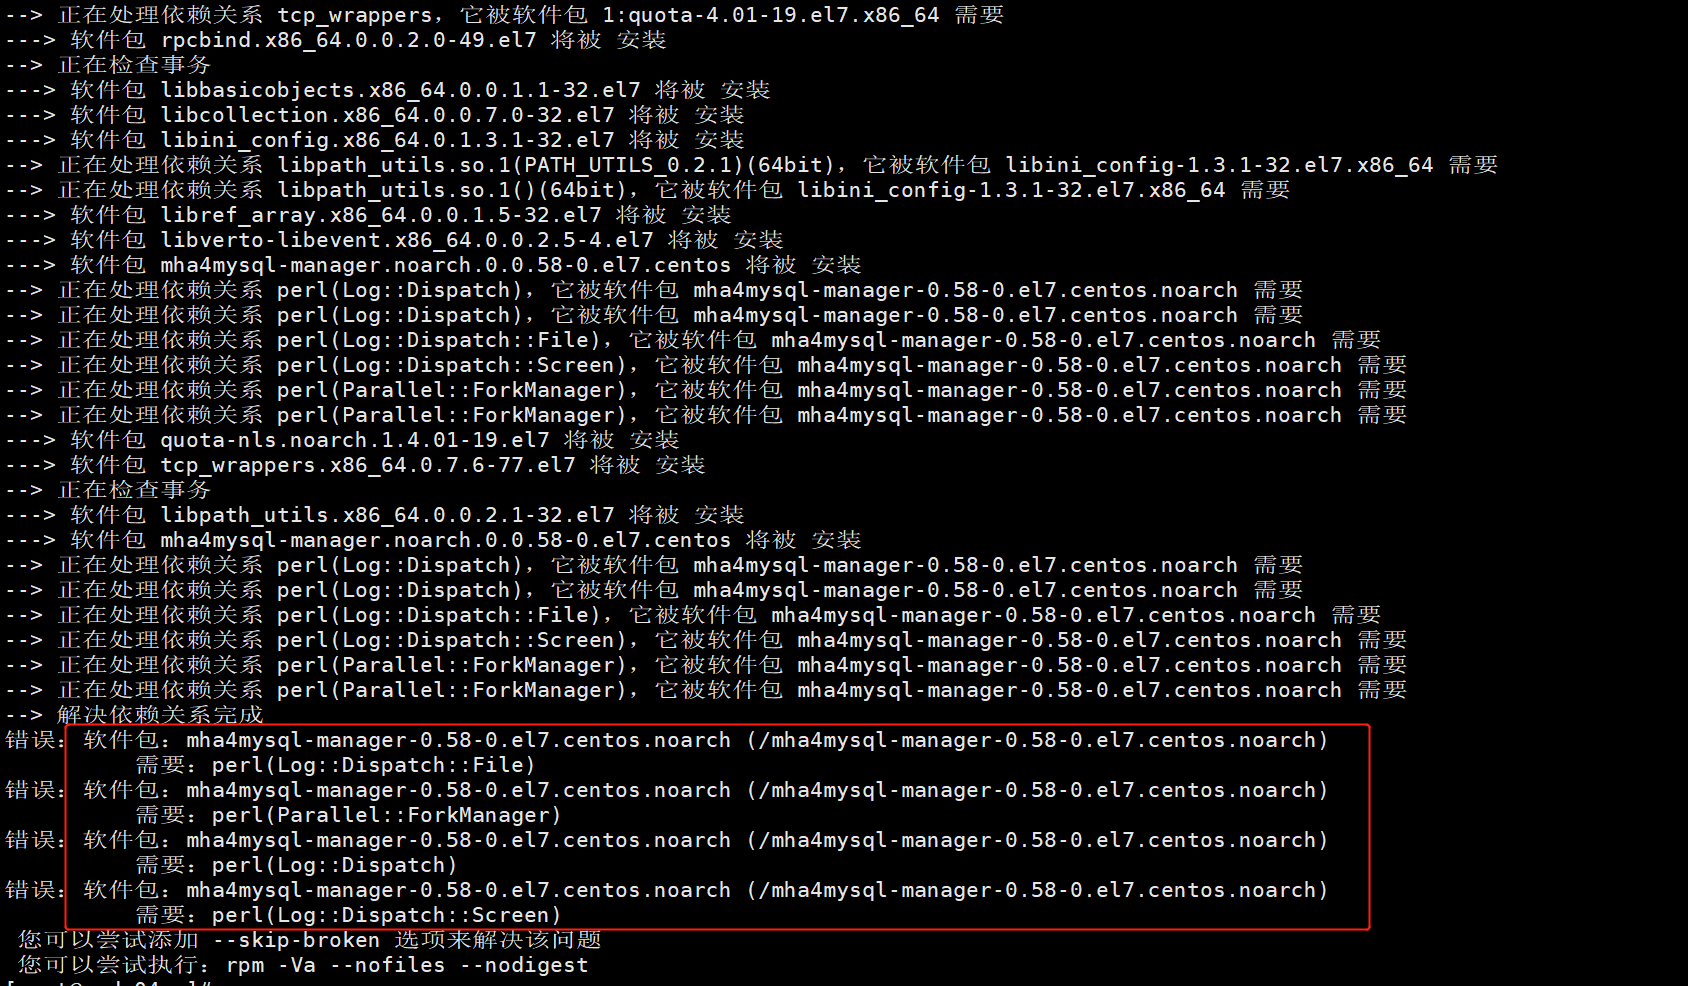
rpm安装之后mha manage安装成功
wget http://dl.fedoraproject.org/pub/epel/epel-release-latest-7.noarch.rpm
rpm -Uvh epel-release*rpm
yum install -y mha4mysql-manager-0.58-0.el7.centos.noarch.rpm mha4mysql-node-0.58-0.el7.centos.noarch.rpm
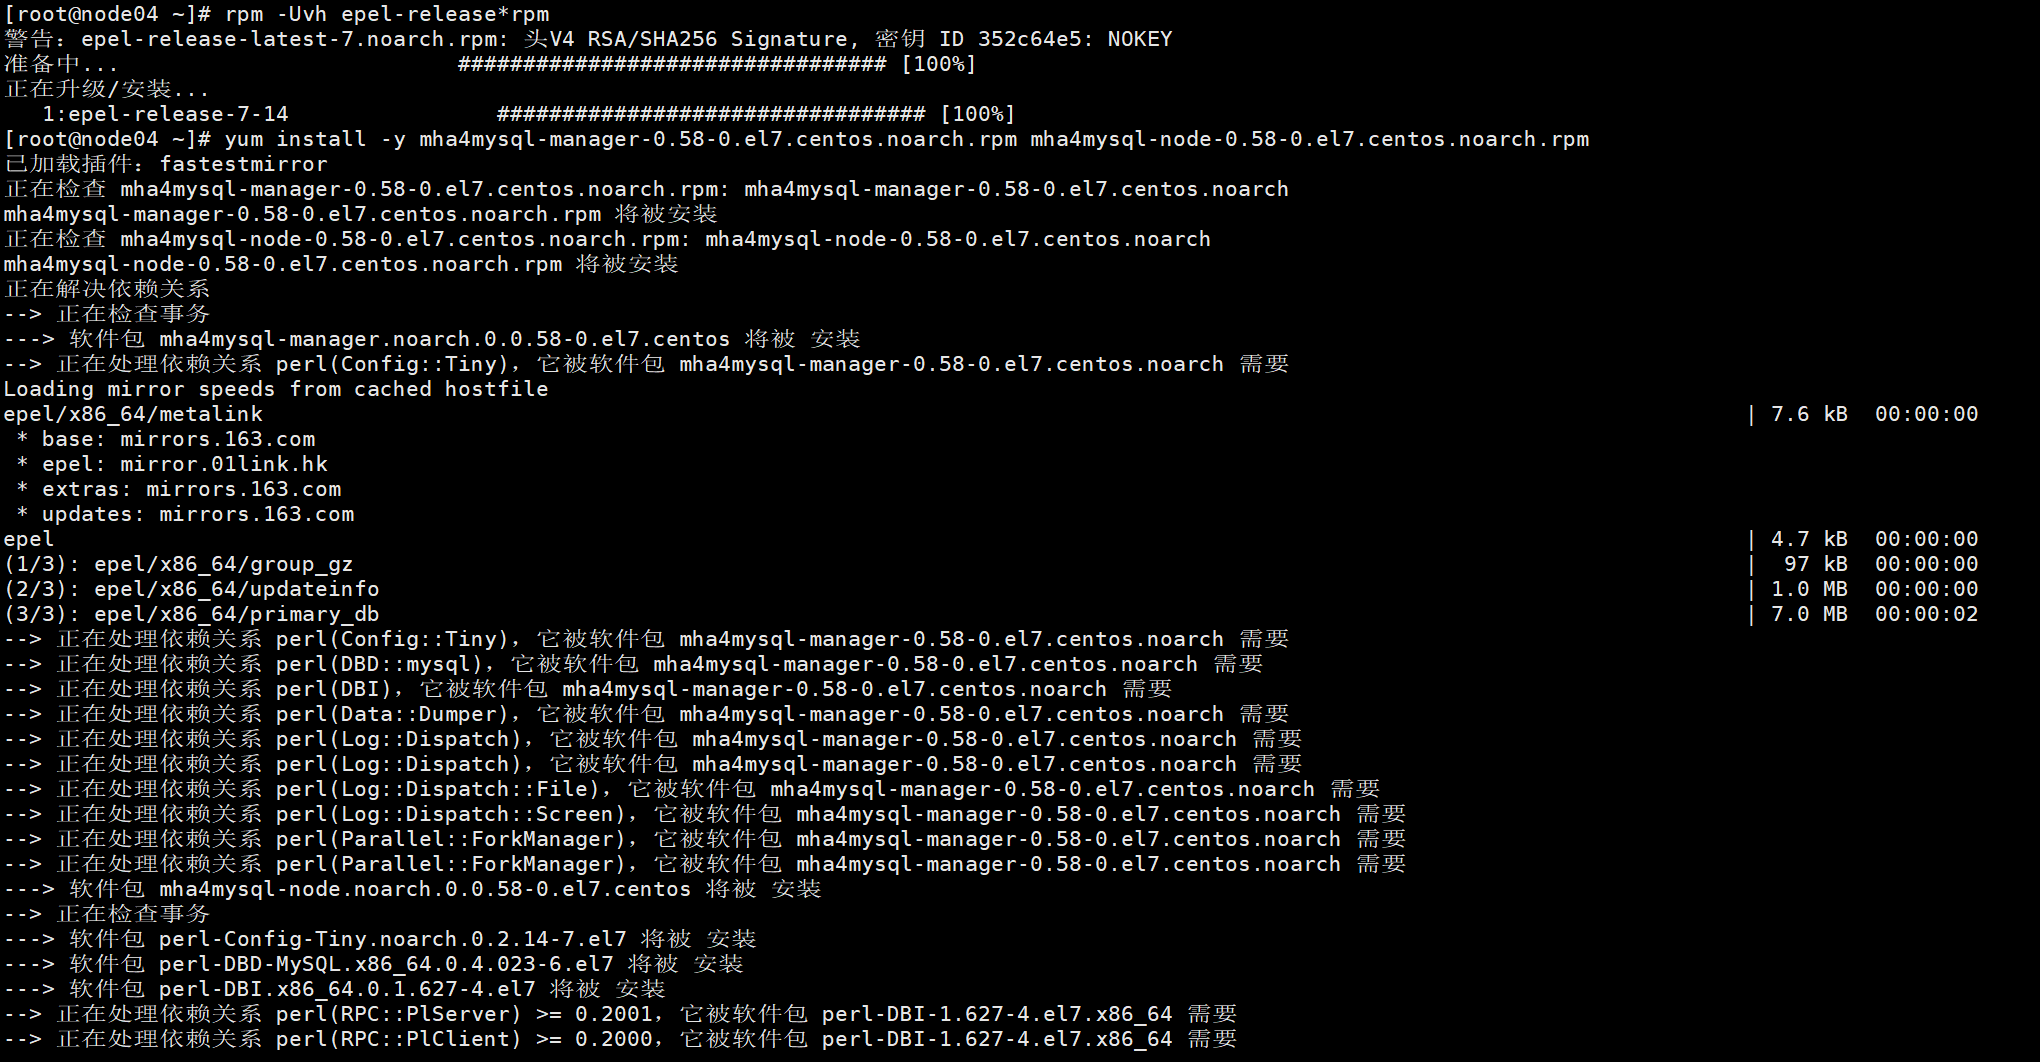
Master、Slave 1、Slave 2 都要安装 mha4mysql-node
wget http://dl.fedoraproject.org/pub/epel/epel-release-latest-7.noarch.rpm
rpm -Uvh epel-release*rpm
wget https://qiniu.wsfnk.com/mha4mysql-node-0.58-0.el7.centos.noarch.rpm
yum install -y mha4mysql-node-0.58-0.el7.centos.noarch.rpm
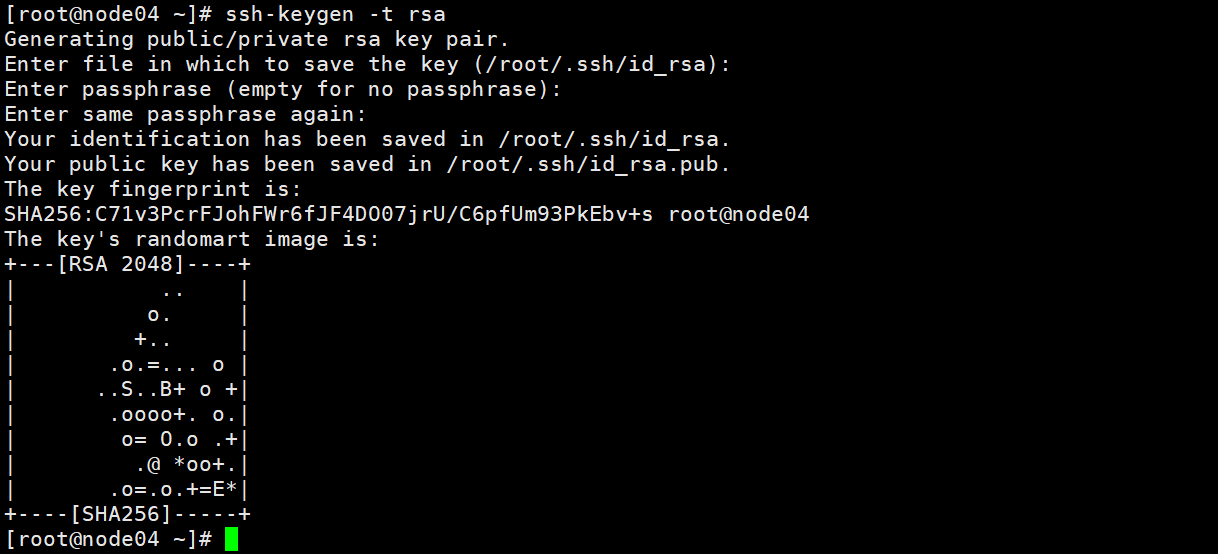
##先生成密钥
# 按三次“Enter”键,生成私有密钥id_rsa和公有密钥id rsa.pub两个文件
ssh-keygen -t rsa
#发送密钥
ssh-copy-id -i /root/.ssh/id_rsa.pub 192.168.102.154
ssh-copy-id -i /root/.ssh/id_rsa.pub 192.168.102.129
ssh-copy-id -i /root/.ssh/id_rsa.pub 192.168.102.110

# Master
ssh-keygen -t rsa
ssh-copy-id -i /root/.ssh/id_rsa.pub 192.168.102.132
ssh-copy-id -i /root/.ssh/id_rsa.pub 192.168.102.129
ssh-copy-id -i /root/.ssh/id_rsa.pub 192.168.102.110

# Slave 1
ssh-keygen -t rsa
ssh-copy-id -i /root/.ssh/id_rsa.pub 192.168.102.132
ssh-copy-id -i /root/.ssh/id_rsa.pub 192.168.102.154
ssh-copy-id -i /root/.ssh/id_rsa.pub 192.168.102.110

# Slave 2
ssh-keygen -t rsa
ssh-copy-id -i /root/.ssh/id_rsa.pub 192.168.102.132
ssh-copy-id -i /root/.ssh/id_rsa.pub 192.168.102.154
ssh-copy-id -i /root/.ssh/id_rsa.pub 192.168.102.129
登录MySQL的master节点,创建复制用户
mysql -h192.168.102.154 -P3306 -uroot -p'CWCcwy12'
#给予所有权限的创建
grant all on *.* TO 'wxhntmy'@"%" identified by "CWCcwy12";
#刷新权限
flush privileges;
在 MHA 节点配置 MHA 工作目录及配置文件
mkdir -p /etc/masterha
vim /etc/masterha/app1.cnf
[server default]
manager_workdir=/etc/masterha
# manager 日志文件
manager_log=/var/log/masterha.log
master_binlog_dir=/etc/masterha
#MySQL管理帐号和密码
password=CWCcwy12
user=root
ping_interval=1
remote_workdir=/tmp
# 复制帐号和密码
repl_password=CWCcwy12
repl_user=wxhntmy
# 系统ssh用户
ssh_user=root

[server1]
hostname=192.168.102.154
port=3306

[server2]
hostname=192.168.102.129
port=3306
## 设置为候选master,如果设置该参数以后,发生主从切换以后将会将此从库提升为主库,即使这个主库不是集群中事件最新的slave
candidate_master=1
## 默认情况下如果一个slave落后master 100M的relay logs的话,MHA将不会选择该slave作为一个新的master,因为对于这个slave的恢复需要花费很长时间,通过设置check_repl_delay=0,MHA触发切换在选择一个新的master的时候将会忽略复制延时,这个参数对于设置了candidate_master=1的主机非常有用,因为这个候选主在切换的过程中一定是新的master
check_repl_delay=0

[server3]
hostname=192.168.102.110
port=3306
#no_master=1    ##no_master表示这个节点不能作为master
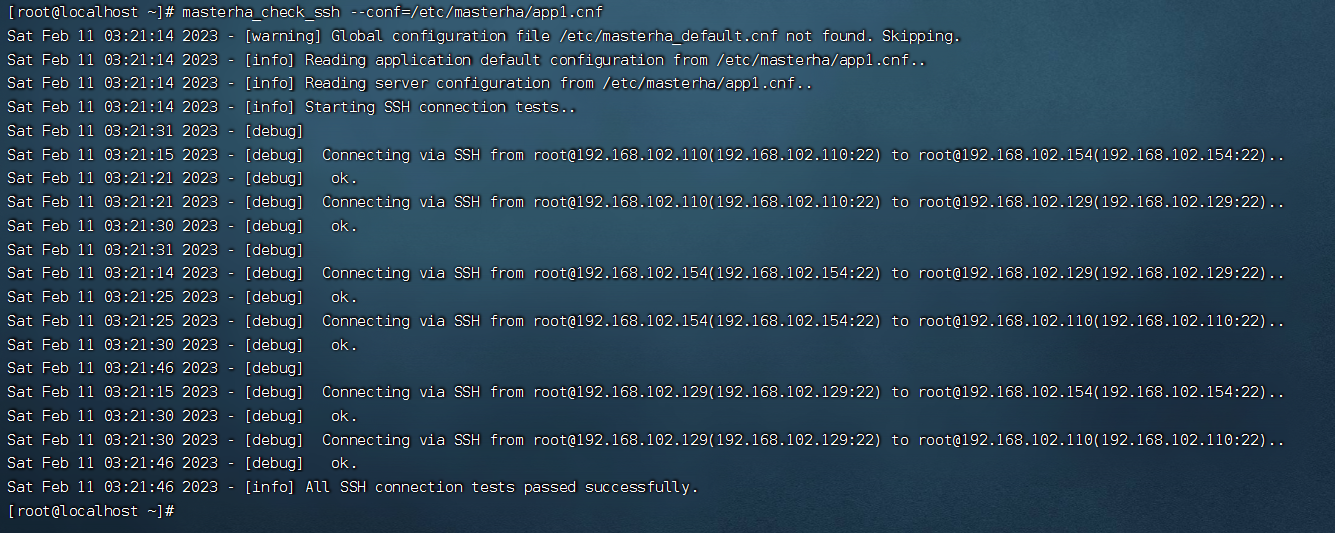
检测 SSH 连接
masterha_check_ssh --conf=/etc/masterha/app1.cnf
检测复制功能
masterha_check_repl --conf=/etc/masterha/app1.cnf
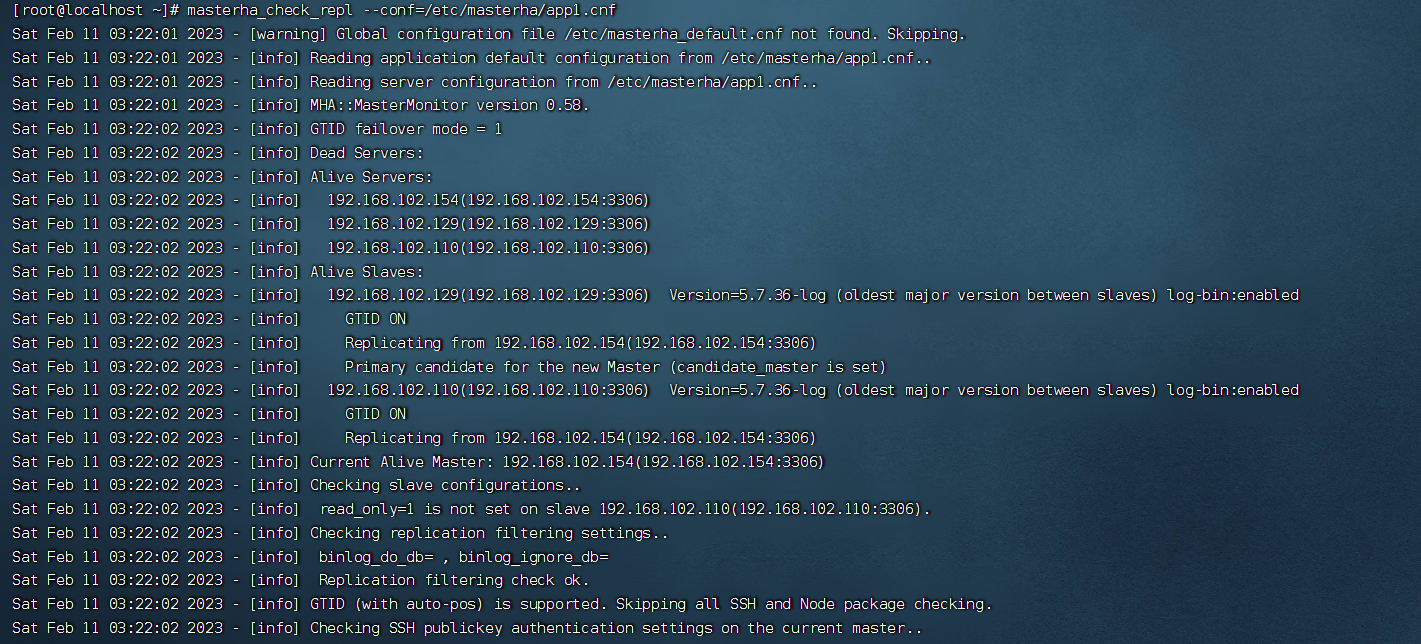
[root@localhost ~]# masterha_check_repl --conf=/etc/masterha/app1.cnf
Sat Feb 11 03:22:01 2023 - [warning] Global configuration file /etc/masterha_default.cnf not found. Skipping.
Sat Feb 11 03:22:01 2023 - [info] Reading application default configuration from /etc/masterha/app1.cnf..
Sat Feb 11 03:22:01 2023 - [info] Reading server configuration from /etc/masterha/app1.cnf..
Sat Feb 11 03:22:01 2023 - [info] MHA::MasterMonitor version 0.58.
Sat Feb 11 03:22:02 2023 - [info] GTID failover mode = 1
Sat Feb 11 03:22:02 2023 - [info] Dead Servers:
Sat Feb 11 03:22:02 2023 - [info] Alive Servers:
Sat Feb 11 03:22:02 2023 - [info]   192.168.102.154(192.168.102.154:3306)
Sat Feb 11 03:22:02 2023 - [info]   192.168.102.129(192.168.102.129:3306)
Sat Feb 11 03:22:02 2023 - [info]   192.168.102.110(192.168.102.110:3306)
Sat Feb 11 03:22:02 2023 - [info] Alive Slaves:
Sat Feb 11 03:22:02 2023 - [info]   192.168.102.129(192.168.102.129:3306)  Version=5.7.36-log (oldest major version between slaves) log-bin:enabled
Sat Feb 11 03:22:02 2023 - [info]     GTID ON
Sat Feb 11 03:22:02 2023 - [info]     Replicating from 192.168.102.154(192.168.102.154:3306)
Sat Feb 11 03:22:02 2023 - [info]     Primary candidate for the new Master (candidate_master is set)
Sat Feb 11 03:22:02 2023 - [info]   192.168.102.110(192.168.102.110:3306)  Version=5.7.36-log (oldest major version between slaves) log-bin:enabled
Sat Feb 11 03:22:02 2023 - [info]     GTID ON
Sat Feb 11 03:22:02 2023 - [info]     Replicating from 192.168.102.154(192.168.102.154:3306)
Sat Feb 11 03:22:02 2023 - [info] Current Alive Master: 192.168.102.154(192.168.102.154:3306)
Sat Feb 11 03:22:02 2023 - [info] Checking slave configurations..
Sat Feb 11 03:22:02 2023 - [info]  read_only=1 is not set on slave 192.168.102.110(192.168.102.110:3306).
Sat Feb 11 03:22:02 2023 - [info] Checking replication filtering settings..
Sat Feb 11 03:22:02 2023 - [info]  binlog_do_db= , binlog_ignore_db=
Sat Feb 11 03:22:02 2023 - [info]  Replication filtering check ok.
Sat Feb 11 03:22:02 2023 - [info] GTID (with auto-pos) is supported. Skipping all SSH and Node package checking.
Sat Feb 11 03:22:02 2023 - [info] Checking SSH publickey authentication settings on the current master..
Sat Feb 11 03:22:07 2023 - [warning] HealthCheck: Got timeout on checking SSH connection to 192.168.102.154! at /usr/share/perl5/vendor_perl/MHA/HealthCheck.pm line 343.
Sat Feb 11 03:22:07 2023 - [info]
192.168.102.154(192.168.102.154:3306) (current master)
 +--192.168.102.129(192.168.102.129:3306)
 +--192.168.102.110(192.168.102.110:3306)

Sat Feb 11 03:22:07 2023 - [info] Checking replication health on 192.168.102.129..
Sat Feb 11 03:22:07 2023 - [info]  ok.
Sat Feb 11 03:22:07 2023 - [info] Checking replication health on 192.168.102.110..
Sat Feb 11 03:22:07 2023 - [info]  ok.
Sat Feb 11 03:22:07 2023 - [warning] master_ip_failover_script is not defined.
Sat Feb 11 03:22:07 2023 - [warning] shutdown_script is not defined.
Sat Feb 11 03:22:07 2023 - [info] Got exit code 0 (Not master dead).

MySQL Replication Health is OK.
[root@localhost ~]#
nohup masterha_manager --conf=/etc/masterha/app1.cnf --remove_dead_master_conf --ignore_last_failover < /dev/null > /var/log/masterha.log 2>&1 &
ps -ef | grep masterha_manager

为了手动测试,先把manager关闭,不关的话手动切不了,manager会自动切,manager是自动切换的工具。
masterha_stop --conf=/etc/masterha/app1.cnf
ps -ef | grep masterha_manager

在 Master 节点执行
ps -ef | grep mysql
kill -9 进程id

在 MHA 节点执行(MHA 配置文件设置 Slave 1 为备用 Master)
masterha_master_switch --master_state=dead --conf=/etc/masterha/app1.cnf \
--dead_master_host=192.168.102.154 --dead_master_ip=192.168.102.154 --dead_master_port=3306 \
--new_master_host=192.168.102.129 --new_master_port=3306
中间都选yes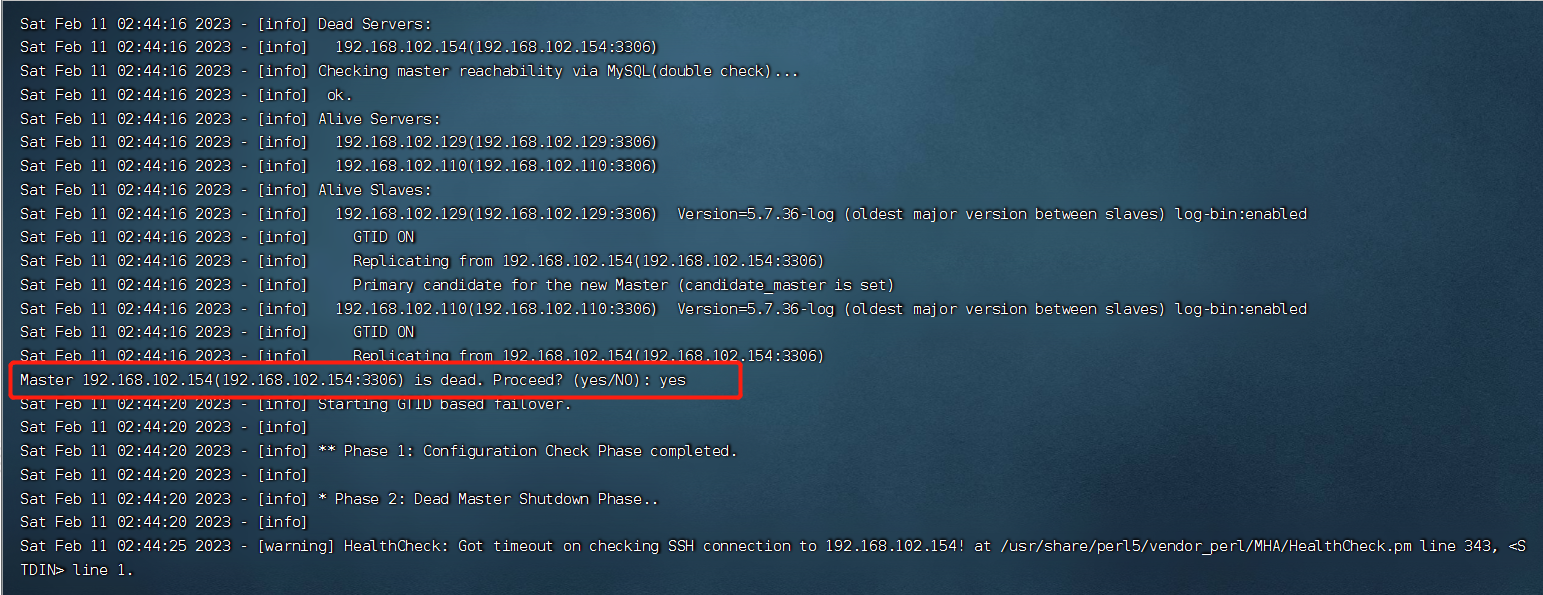
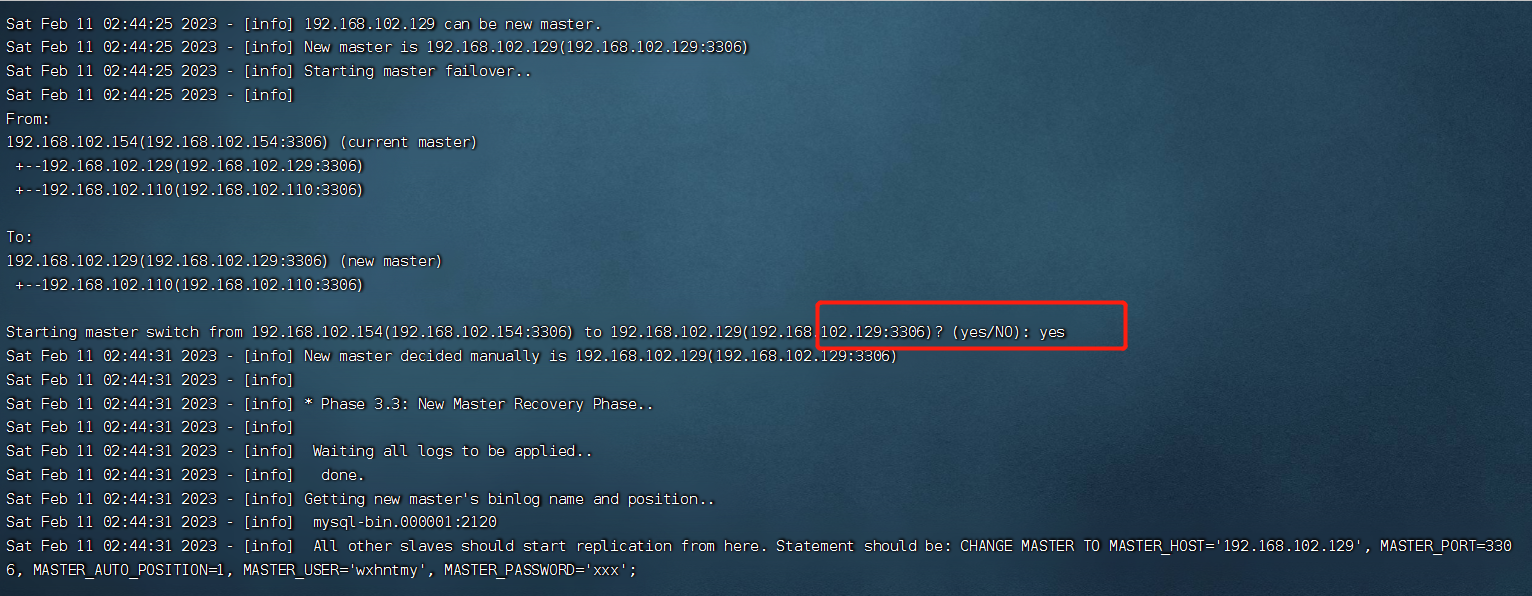
完整切换日志
Sat Feb 11 02:44:15 2023 - [warning] Global configuration file /etc/masterha_default.cnf not found. Skipping.
Sat Feb 11 02:44:15 2023 - [info] Reading application default configuration from /etc/masterha/app1.cnf..
Sat Feb 11 02:44:15 2023 - [info] Reading server configuration from /etc/masterha/app1.cnf..
Sat Feb 11 02:44:15 2023 - [info] MHA::MasterFailover version 0.58.
Sat Feb 11 02:44:15 2023 - [info] Starting master failover.
Sat Feb 11 02:44:15 2023 - [info]
Sat Feb 11 02:44:15 2023 - [info] * Phase 1: Configuration Check Phase..
Sat Feb 11 02:44:15 2023 - [info]
Sat Feb 11 02:44:16 2023 - [info] GTID failover mode = 1
Sat Feb 11 02:44:16 2023 - [info] Dead Servers:
Sat Feb 11 02:44:16 2023 - [info]   192.168.102.154(192.168.102.154:3306)
Sat Feb 11 02:44:16 2023 - [info] Checking master reachability via MySQL(double check)...
Sat Feb 11 02:44:16 2023 - [info]  ok.
Sat Feb 11 02:44:16 2023 - [info] Alive Servers:
Sat Feb 11 02:44:16 2023 - [info]   192.168.102.129(192.168.102.129:3306)
Sat Feb 11 02:44:16 2023 - [info]   192.168.102.110(192.168.102.110:3306)
Sat Feb 11 02:44:16 2023 - [info] Alive Slaves:
Sat Feb 11 02:44:16 2023 - [info]   192.168.102.129(192.168.102.129:3306)  Version=5.7.36-log (oldest major version between slaves) log-bin:enabled
Sat Feb 11 02:44:16 2023 - [info]     GTID ON
Sat Feb 11 02:44:16 2023 - [info]     Replicating from 192.168.102.154(192.168.102.154:3306)
Sat Feb 11 02:44:16 2023 - [info]     Primary candidate for the new Master (candidate_master is set)
Sat Feb 11 02:44:16 2023 - [info]   192.168.102.110(192.168.102.110:3306)  Version=5.7.36-log (oldest major version between slaves) log-bin:enabled
Sat Feb 11 02:44:16 2023 - [info]     GTID ON
Sat Feb 11 02:44:16 2023 - [info]     Replicating from 192.168.102.154(192.168.102.154:3306)
Master 192.168.102.154(192.168.102.154:3306) is dead. Proceed? (yes/NO): yes
Sat Feb 11 02:44:20 2023 - [info] Starting GTID based failover.
Sat Feb 11 02:44:20 2023 - [info]
Sat Feb 11 02:44:20 2023 - [info] ** Phase 1: Configuration Check Phase completed.
Sat Feb 11 02:44:20 2023 - [info]
Sat Feb 11 02:44:20 2023 - [info] * Phase 2: Dead Master Shutdown Phase..
Sat Feb 11 02:44:20 2023 - [info]
Sat Feb 11 02:44:25 2023 - [warning] HealthCheck: Got timeout on checking SSH connection to 192.168.102.154! at /usr/share/perl5/vendor_perl/MHA/HealthCheck.pm line 343, <STDIN> line 1.
Sat Feb 11 02:44:25 2023 - [info] Forcing shutdown so that applications never connect to the current master..
Sat Feb 11 02:44:25 2023 - [warning] master_ip_failover_script is not set. Skipping invalidating dead master IP address.
Sat Feb 11 02:44:25 2023 - [warning] shutdown_script is not set. Skipping explicit shutting down of the dead master.
Sat Feb 11 02:44:25 2023 - [info] * Phase 2: Dead Master Shutdown Phase completed.
Sat Feb 11 02:44:25 2023 - [info]
Sat Feb 11 02:44:25 2023 - [info] * Phase 3: Master Recovery Phase..
Sat Feb 11 02:44:25 2023 - [info]
Sat Feb 11 02:44:25 2023 - [info] * Phase 3.1: Getting Latest Slaves Phase..
Sat Feb 11 02:44:25 2023 - [info]
Sat Feb 11 02:44:25 2023 - [info] The latest binary log file/position on all slaves is mysql-bin.000007:1434
Sat Feb 11 02:44:25 2023 - [info] Retrieved Gtid Set: 7bd3997a-a963-11ed-8982-000c29a8cdb4:1-6
Sat Feb 11 02:44:25 2023 - [info] Latest slaves (Slaves that received relay log files to the latest):
Sat Feb 11 02:44:25 2023 - [info]   192.168.102.129(192.168.102.129:3306)  Version=5.7.36-log (oldest major version between slaves) log-bin:enabled
Sat Feb 11 02:44:25 2023 - [info]     GTID ON
Sat Feb 11 02:44:25 2023 - [info]     Replicating from 192.168.102.154(192.168.102.154:3306)
Sat Feb 11 02:44:25 2023 - [info]     Primary candidate for the new Master (candidate_master is set)
Sat Feb 11 02:44:25 2023 - [info]   192.168.102.110(192.168.102.110:3306)  Version=5.7.36-log (oldest major version between slaves) log-bin:enabled
Sat Feb 11 02:44:25 2023 - [info]     GTID ON
Sat Feb 11 02:44:25 2023 - [info]     Replicating from 192.168.102.154(192.168.102.154:3306)
Sat Feb 11 02:44:25 2023 - [info] The oldest binary log file/position on all slaves is mysql-bin.000007:1434
Sat Feb 11 02:44:25 2023 - [info] Retrieved Gtid Set: 7bd3997a-a963-11ed-8982-000c29a8cdb4:1-6
Sat Feb 11 02:44:25 2023 - [info] Oldest slaves:
Sat Feb 11 02:44:25 2023 - [info]   192.168.102.129(192.168.102.129:3306)  Version=5.7.36-log (oldest major version between slaves) log-bin:enabled
Sat Feb 11 02:44:25 2023 - [info]     GTID ON
Sat Feb 11 02:44:25 2023 - [info]     Replicating from 192.168.102.154(192.168.102.154:3306)
Sat Feb 11 02:44:25 2023 - [info]     Primary candidate for the new Master (candidate_master is set)
Sat Feb 11 02:44:25 2023 - [info]   192.168.102.110(192.168.102.110:3306)  Version=5.7.36-log (oldest major version between slaves) log-bin:enabled
Sat Feb 11 02:44:25 2023 - [info]     GTID ON
Sat Feb 11 02:44:25 2023 - [info]     Replicating from 192.168.102.154(192.168.102.154:3306)
Sat Feb 11 02:44:25 2023 - [info]
Sat Feb 11 02:44:25 2023 - [info] * Phase 3.3: Determining New Master Phase..
Sat Feb 11 02:44:25 2023 - [info]
Sat Feb 11 02:44:25 2023 - [info] 192.168.102.129 can be new master.
Sat Feb 11 02:44:25 2023 - [info] New master is 192.168.102.129(192.168.102.129:3306)
Sat Feb 11 02:44:25 2023 - [info] Starting master failover..
Sat Feb 11 02:44:25 2023 - [info]
From:
192.168.102.154(192.168.102.154:3306) (current master)
 +--192.168.102.129(192.168.102.129:3306)
 +--192.168.102.110(192.168.102.110:3306)

To:
192.168.102.129(192.168.102.129:3306) (new master)
 +--192.168.102.110(192.168.102.110:3306)

Starting master switch from 192.168.102.154(192.168.102.154:3306) to 192.168.102.129(192.168.102.129:3306)? (yes/NO): yes
Sat Feb 11 02:44:31 2023 - [info] New master decided manually is 192.168.102.129(192.168.102.129:3306)
Sat Feb 11 02:44:31 2023 - [info]
Sat Feb 11 02:44:31 2023 - [info] * Phase 3.3: New Master Recovery Phase..
Sat Feb 11 02:44:31 2023 - [info]
Sat Feb 11 02:44:31 2023 - [info]  Waiting all logs to be applied..
Sat Feb 11 02:44:31 2023 - [info]   done.
Sat Feb 11 02:44:31 2023 - [info] Getting new master''s binlog name and position..
Sat Feb 11 02:44:31 2023 - [info]  mysql-bin.000001:2120
Sat Feb 11 02:44:31 2023 - [info]  All other slaves should start replication from here. Statement should be: CHANGE MASTER TO MASTER_HOST='192.168.102.129', MASTER_PORT=3306, MASTER_AUTO_POSITION=1, MASTER_USER='wxhntmy', MASTER_PASSWORD='xxx';
Sat Feb 11 02:44:31 2023 - [info] Master Recovery succeeded. File:Pos:Exec_Gtid_Set: mysql-bin.000001, 2120, 7bd3997a-a963-11ed-8982-000c29a8cdb4:1-6,
dea68c9a-a964-11ed-b3e0-000c29d74e03:1-3
Sat Feb 11 02:44:31 2023 - [warning] master_ip_failover_script is not set. Skipping taking over new master IP address.
Sat Feb 11 02:44:31 2023 - [info] ** Finished master recovery successfully.
Sat Feb 11 02:44:31 2023 - [info] * Phase 3: Master Recovery Phase completed.
Sat Feb 11 02:44:31 2023 - [info]
Sat Feb 11 02:44:31 2023 - [info] * Phase 4: Slaves Recovery Phase..
Sat Feb 11 02:44:31 2023 - [info]
Sat Feb 11 02:44:31 2023 - [info]
Sat Feb 11 02:44:31 2023 - [info] * Phase 4.1: Starting Slaves in parallel..
Sat Feb 11 02:44:31 2023 - [info]
Sat Feb 11 02:44:31 2023 - [info] -- Slave recovery on host 192.168.102.110(192.168.102.110:3306) started, pid: 39214. Check tmp log /etc/masterha/192.168.102.110_3306_20230211024415.log if it takes time..
Sat Feb 11 02:44:33 2023 - [info]
Sat Feb 11 02:44:33 2023 - [info] Log messages from 192.168.102.110 ...
Sat Feb 11 02:44:33 2023 - [info]
Sat Feb 11 02:44:31 2023 - [info]  Resetting slave 192.168.102.110(192.168.102.110:3306) and starting replication from the new master 192.168.102.129(192.168.102.129:3306)..
Sat Feb 11 02:44:31 2023 - [info]  Executed CHANGE MASTER.
Sat Feb 11 02:44:32 2023 - [info]  Slave started.
Sat Feb 11 02:44:32 2023 - [info]  gtid_wait(7bd3997a-a963-11ed-8982-000c29a8cdb4:1-6,
dea68c9a-a964-11ed-b3e0-000c29d74e03:1-3) completed on 192.168.102.110(192.168.102.110:3306). Executed 0 events.
Sat Feb 11 02:44:33 2023 - [info] End of log messages from 192.168.102.110.
Sat Feb 11 02:44:33 2023 - [info] -- Slave on host 192.168.102.110(192.168.102.110:3306) started.
Sat Feb 11 02:44:33 2023 - [info] All new slave servers recovered successfully.
Sat Feb 11 02:44:33 2023 - [info]
Sat Feb 11 02:44:33 2023 - [info] * Phase 5: New master cleanup phase..
Sat Feb 11 02:44:33 2023 - [info]
Sat Feb 11 02:44:33 2023 - [info] Resetting slave info on the new master..
Sat Feb 11 02:44:33 2023 - [info]  192.168.102.129: Resetting slave info succeeded.
Sat Feb 11 02:44:33 2023 - [info] Master failover to 192.168.102.129(192.168.102.129:3306) completed successfully.
Sat Feb 11 02:44:33 2023 - [info]

----- Failover Report -----

app1: MySQL Master failover 192.168.102.154(192.168.102.154:3306) to 192.168.102.129(192.168.102.129:3306) succeeded

Master 192.168.102.154(192.168.102.154:3306) is down!

Check MHA Manager logs at localhost.localdomain for details.

Started manual(interactive) failover.
Selected 192.168.102.129(192.168.102.129:3306) as a new master.
192.168.102.129(192.168.102.129:3306): OK: Applying all logs succeeded.
192.168.102.110(192.168.102.110:3306): OK: Slave started, replicating from 192.168.102.129(192.168.102.129:3306)
192.168.102.129(192.168.102.129:3306): Resetting slave info succeeded.
Master failover to 192.168.102.129(192.168.102.129:3306) completed successfully.
登录 Slave 1 的 MySQL
mysql -h192.168.102.129 -P3306 -uroot -p'CWCcwy12'
show master status;
show slave status;
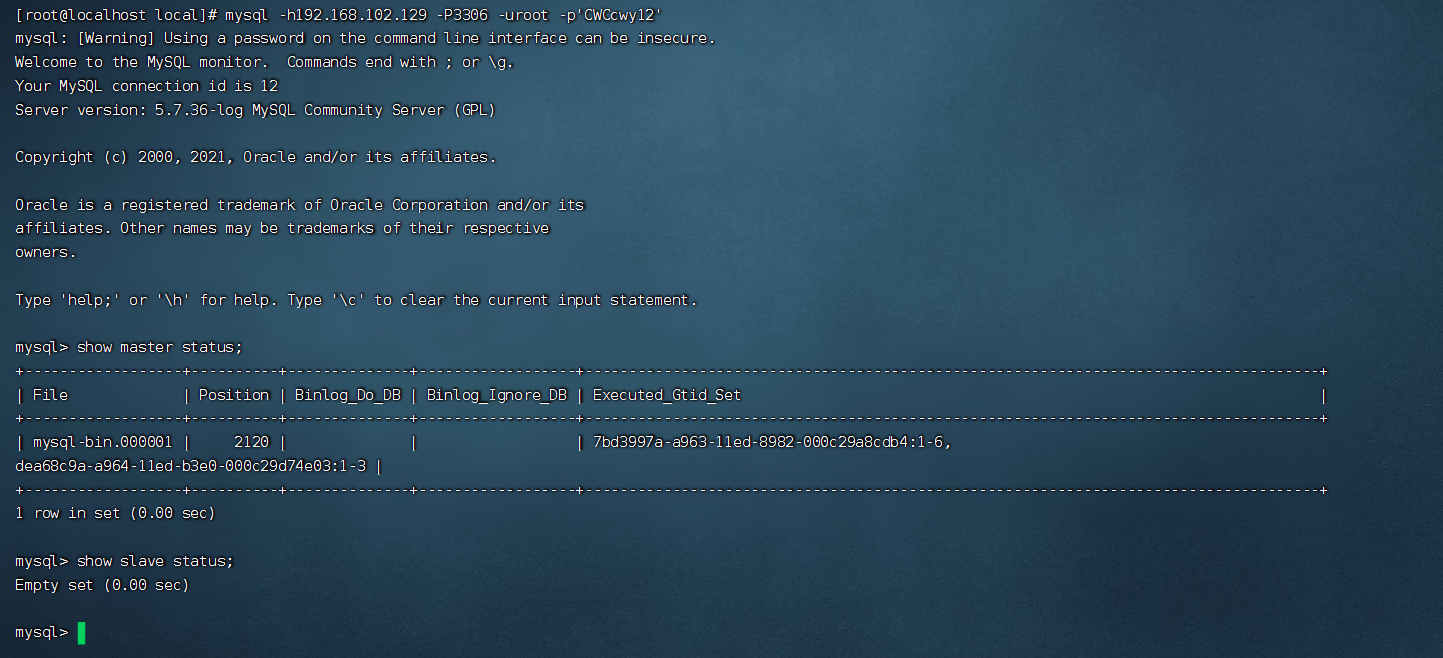
登录 Slave 2 的 MySQL
mysql -h192.168.102.110 -P3306 -uroot -p'CWCcwy12'
show master status;
show slave status\G
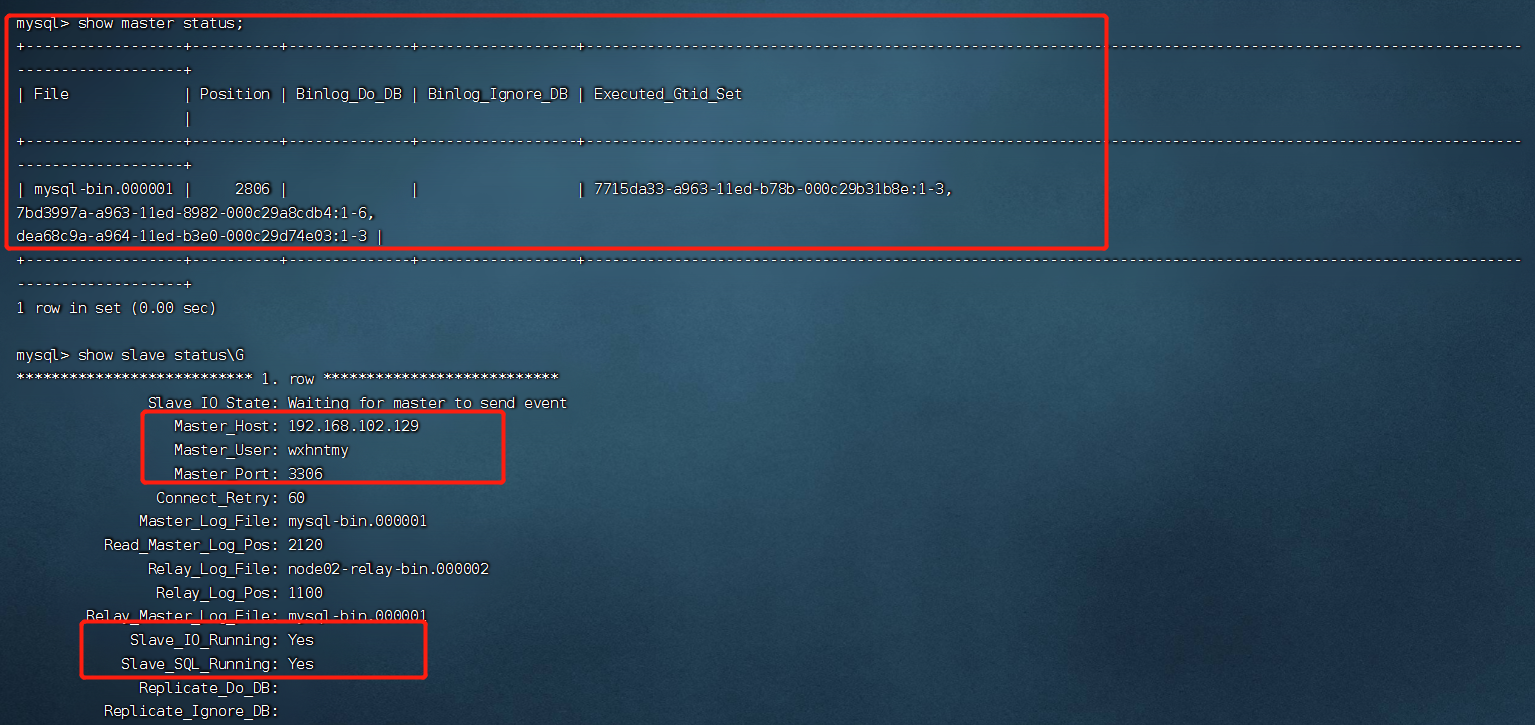
故障转移成功后,MHA 将会自动停止,使用 masterhacheckstatus 会看到如下提示
masterha_check_status --conf=/etc/masterha/app1.cnf

原来的主节点(Master)机器重启后,不会自动和新 Master 同步数据,这个时候最好重新备份一下,重新把该机器加入到现有的主从架构中。
nohup mysqld --defaults-file=/etc/my.cnf --user=mysql >> /var/log/mysqld_run.log 2>&1 &
mysql -h192.168.102.154 -P3306 -uroot -p'CWCcwy12'
CHANGE MASTER TO MASTER_HOST = '192.168.102.129', MASTER_USER = 'wxhntmy',MASTER_PASSWORD = 'CWCcwy12';
start slave;
show slave status\G
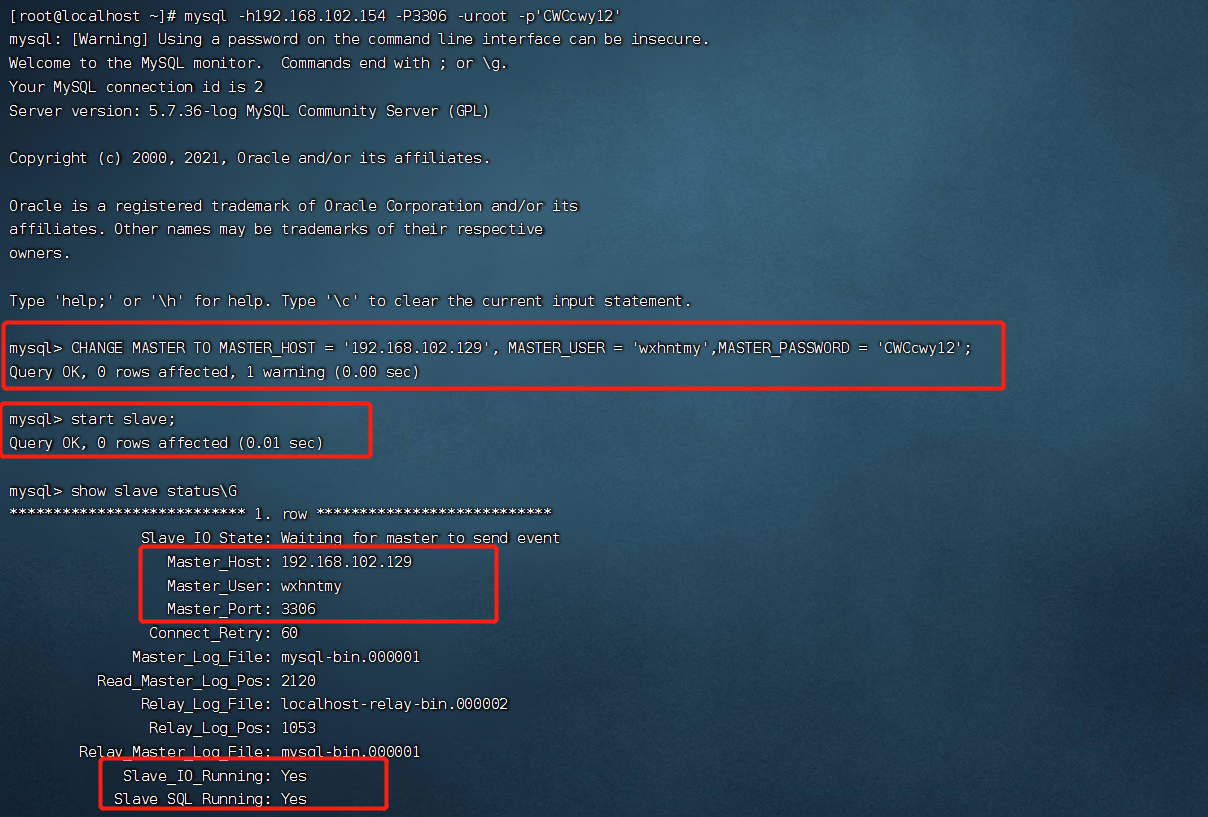
通过第 ② 步的切换,现在主节点已经变成了 Slave 1,同样的方式把 Master 重新添加到现在的主从复制中。
masterha_check_status --conf=/etc/masterha/app1.cnf

mha 必须要是 stopped 状态,如果 mha 是 running状 态的话,切换会报错。
masterha_master_switch --conf=/etc/masterha/app1.cnf --master_state=alive \
--new_master_host=192.168.102.154 --new_master_port=3306 --orig_master_is_new_slave \
--running_updates_limit=100
三次选择都输入yes
完整切换日志
Sat Feb 11 03:08:05 2023 - [info] MHA::MasterRotate version 0.58.
Sat Feb 11 03:08:05 2023 - [info] Starting online master switch..
Sat Feb 11 03:08:05 2023 - [info]
Sat Feb 11 03:08:05 2023 - [info] * Phase 1: Configuration Check Phase..
Sat Feb 11 03:08:05 2023 - [info]
Sat Feb 11 03:08:05 2023 - [warning] Global configuration file /etc/masterha_default.cnf not found. Skipping.
Sat Feb 11 03:08:05 2023 - [info] Reading application default configuration from /etc/masterha/app1.cnf..
Sat Feb 11 03:08:05 2023 - [info] Reading server configuration from /etc/masterha/app1.cnf..
Sat Feb 11 03:08:06 2023 - [info] GTID failover mode = 1
Sat Feb 11 03:08:06 2023 - [info] Current Alive Master: 192.168.102.129(192.168.102.129:3306)
Sat Feb 11 03:08:06 2023 - [info] Alive Slaves:
Sat Feb 11 03:08:06 2023 - [info]   192.168.102.154(192.168.102.154:3306)  Version=5.7.36-log (oldest major version between slaves) log-bin:enabled
Sat Feb 11 03:08:06 2023 - [info]     GTID ON
Sat Feb 11 03:08:06 2023 - [info]     Replicating from 192.168.102.129(192.168.102.129:3306)
Sat Feb 11 03:08:06 2023 - [info]   192.168.102.110(192.168.102.110:3306)  Version=5.7.36-log (oldest major version between slaves) log-bin:enabled
Sat Feb 11 03:08:06 2023 - [info]     GTID ON
Sat Feb 11 03:08:06 2023 - [info]     Replicating from 192.168.102.129(192.168.102.129:3306)

It is better to execute FLUSH NO_WRITE_TO_BINLOG TABLES on the master before switching. Is it ok to execute on 192.168.102.129(192.168.102.129:3306)? (YES/no): yes
Sat Feb 11 03:08:08 2023 - [info] Executing FLUSH NO_WRITE_TO_BINLOG TABLES. This may take long time..
Sat Feb 11 03:08:09 2023 - [info]  ok.
Sat Feb 11 03:08:09 2023 - [info] Checking MHA is not monitoring or doing failover..
Sat Feb 11 03:08:09 2023 - [info] Checking replication health on 192.168.102.154..
Sat Feb 11 03:08:09 2023 - [info]  ok.
Sat Feb 11 03:08:09 2023 - [info] Checking replication health on 192.168.102.110..
Sat Feb 11 03:08:09 2023 - [info]  ok.
Sat Feb 11 03:08:09 2023 - [info] 192.168.102.154 can be new master.
Sat Feb 11 03:08:09 2023 - [info]
From:
192.168.102.129(192.168.102.129:3306) (current master)
 +--192.168.102.154(192.168.102.154:3306)
 +--192.168.102.110(192.168.102.110:3306)

To:
192.168.102.154(192.168.102.154:3306) (new master)
 +--192.168.102.110(192.168.102.110:3306)
 +--192.168.102.129(192.168.102.129:3306)

Starting master switch from 192.168.102.129(192.168.102.129:3306) to 192.168.102.154(192.168.102.154:3306)? (yes/NO): yes
Sat Feb 11 03:08:10 2023 - [info] Checking whether 192.168.102.154(192.168.102.154:3306) is ok for the new master..
Sat Feb 11 03:08:10 2023 - [info]  ok.
Sat Feb 11 03:08:10 2023 - [info] 192.168.102.129(192.168.102.129:3306): SHOW SLAVE STATUS returned empty result. To check replication filtering rules, temporarily executing CHANGE MASTER to a dummy host.
Sat Feb 11 03:08:10 2023 - [info] 192.168.102.129(192.168.102.129:3306): Resetting slave pointing to the dummy host.
Sat Feb 11 03:08:11 2023 - [info] ** Phase 1: Configuration Check Phase completed.
Sat Feb 11 03:08:11 2023 - [info]
Sat Feb 11 03:08:11 2023 - [info] * Phase 2: Rejecting updates Phase..
Sat Feb 11 03:08:11 2023 - [info]
master_ip_online_change_script is not defined. If you do not disable writes on the current master manually, applications keep writing on the current master. Is it ok to proceed? (yes/NO): yes
Sat Feb 11 03:08:27 2023 - [info] Locking all tables on the orig master to reject updates from everybody (including root):
Sat Feb 11 03:08:27 2023 - [info] Executing FLUSH TABLES WITH READ LOCK..
Sat Feb 11 03:08:27 2023 - [info]  ok.
Sat Feb 11 03:08:27 2023 - [info] Orig master binlog:pos is mysql-bin.000001:2120.
Sat Feb 11 03:08:27 2023 - [info]  Waiting to execute all relay logs on 192.168.102.154(192.168.102.154:3306)..
Sat Feb 11 03:08:27 2023 - [info]  master_pos_wait(mysql-bin.000001:2120) completed on 192.168.102.154(192.168.102.154:3306). Executed 0 events.
Sat Feb 11 03:08:27 2023 - [info]   done.
Sat Feb 11 03:08:27 2023 - [info] Getting new master''s binlog name and position..
Sat Feb 11 03:08:27 2023 - [info]  mysql-bin.000008:880
Sat Feb 11 03:08:27 2023 - [info]  All other slaves should start replication from here. Statement should be: CHANGE MASTER TO MASTER_HOST='192.168.102.154', MASTER_PORT=3306, MASTER_AUTO_POSITION=1, MASTER_USER='wxhntmy', MASTER_PASSWORD='xxx';
Sat Feb 11 03:08:27 2023 - [info]
Sat Feb 11 03:08:27 2023 - [info] * Switching slaves in parallel..
Sat Feb 11 03:08:27 2023 - [info]
Sat Feb 11 03:08:27 2023 - [info] -- Slave switch on host 192.168.102.110(192.168.102.110:3306) started, pid: 77184
Sat Feb 11 03:08:27 2023 - [info]
Sat Feb 11 03:08:29 2023 - [info] Log messages from 192.168.102.110 ...
Sat Feb 11 03:08:29 2023 - [info]
Sat Feb 11 03:08:27 2023 - [info]  Waiting to execute all relay logs on 192.168.102.110(192.168.102.110:3306)..
Sat Feb 11 03:08:27 2023 - [info]  master_pos_wait(mysql-bin.000001:2120) completed on 192.168.102.110(192.168.102.110:3306). Executed 0 events.
Sat Feb 11 03:08:27 2023 - [info]   done.
Sat Feb 11 03:08:27 2023 - [info]  Resetting slave 192.168.102.110(192.168.102.110:3306) and starting replication from the new master 192.168.102.154(192.168.102.154:3306)..
Sat Feb 11 03:08:27 2023 - [info]  Executed CHANGE MASTER.
Sat Feb 11 03:08:28 2023 - [info]  Slave started.
Sat Feb 11 03:08:29 2023 - [info] End of log messages from 192.168.102.110 ...
Sat Feb 11 03:08:29 2023 - [info]
Sat Feb 11 03:08:29 2023 - [info] -- Slave switch on host 192.168.102.110(192.168.102.110:3306) succeeded.
Sat Feb 11 03:08:29 2023 - [info] Unlocking all tables on the orig master:
Sat Feb 11 03:08:29 2023 - [info] Executing UNLOCK TABLES..
Sat Feb 11 03:08:29 2023 - [info]  ok.
Sat Feb 11 03:08:29 2023 - [info] Starting orig master as a new slave..
Sat Feb 11 03:08:29 2023 - [info]  Resetting slave 192.168.102.129(192.168.102.129:3306) and starting replication from the new master 192.168.102.154(192.168.102.154:3306)..
Sat Feb 11 03:08:29 2023 - [info]  Executed CHANGE MASTER.
Sat Feb 11 03:08:30 2023 - [info]  Slave started.
Sat Feb 11 03:08:30 2023 - [info] All new slave servers switched successfully.
Sat Feb 11 03:08:30 2023 - [info]
Sat Feb 11 03:08:30 2023 - [info] * Phase 5: New master cleanup phase..
Sat Feb 11 03:08:30 2023 - [info]
Sat Feb 11 03:08:30 2023 - [info]  192.168.102.154: Resetting slave info succeeded.
Sat Feb 11 03:08:30 2023 - [info] Switching master to 192.168.102.154(192.168.102.154:3306) completed successfully.
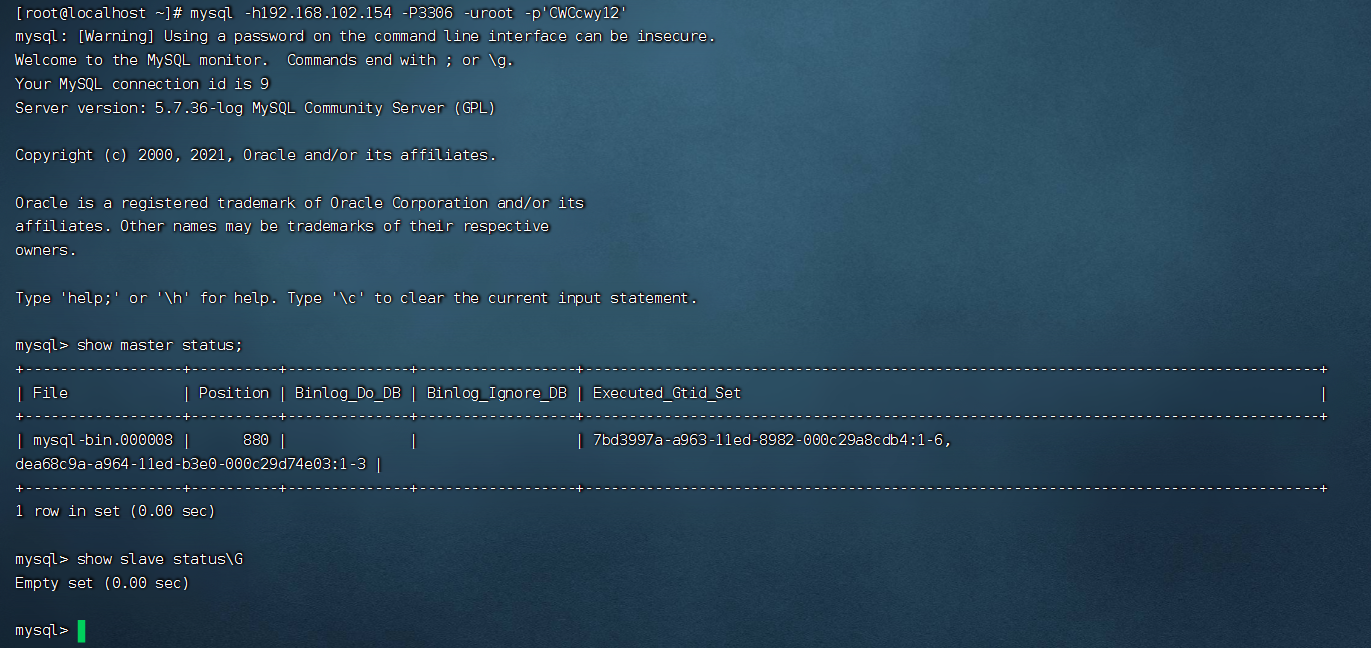
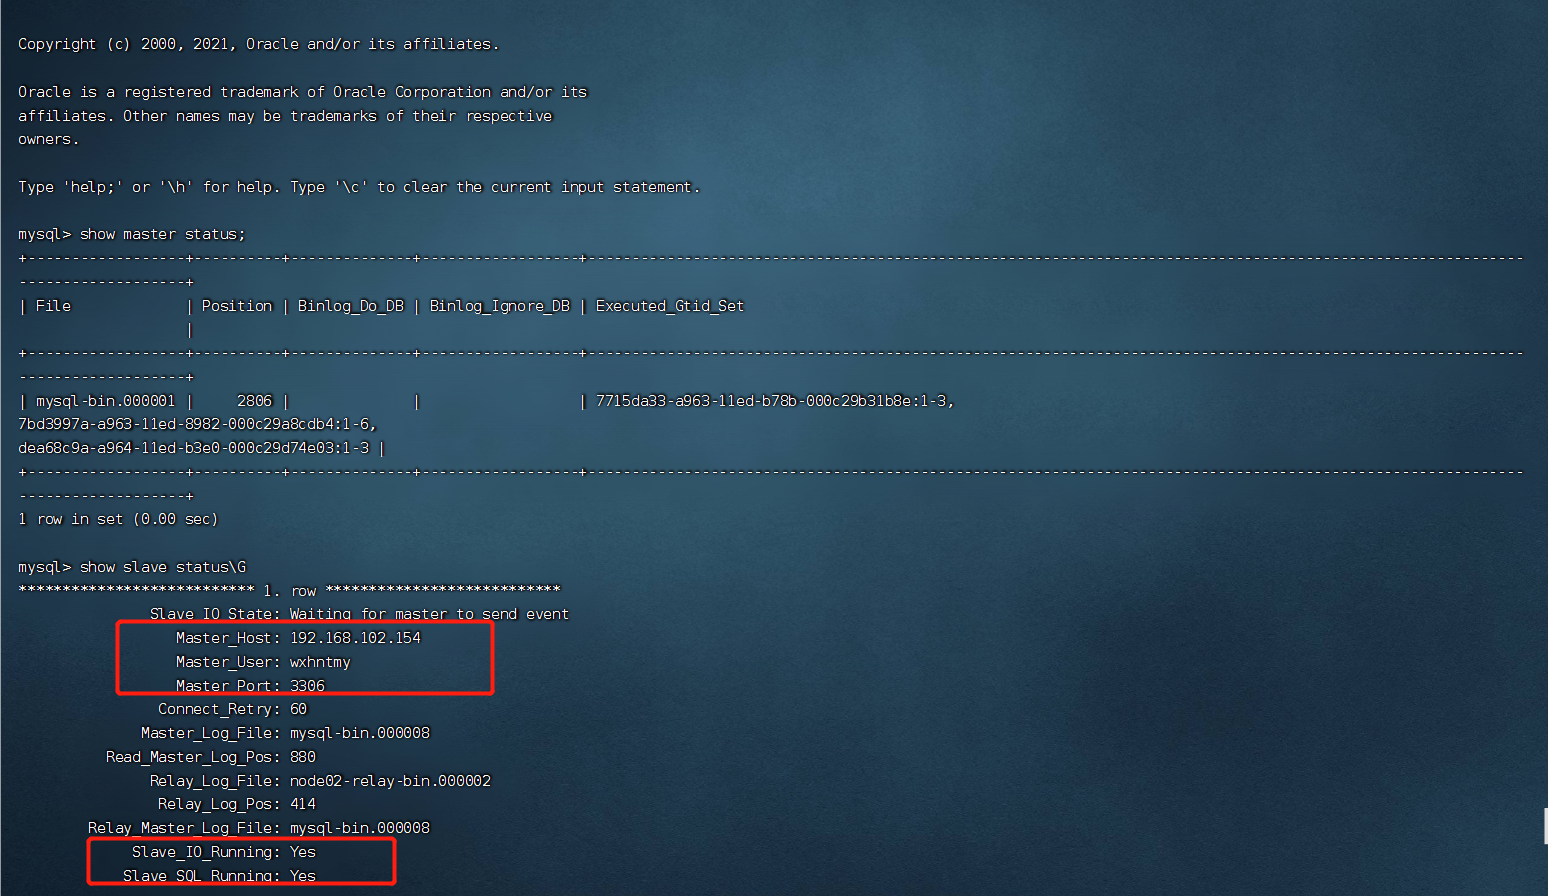
登录 Master 查看
mysql -h192.168.102.154 -P3306 -uroot -p'CWCcwy12'
show master status;
show slave status\G
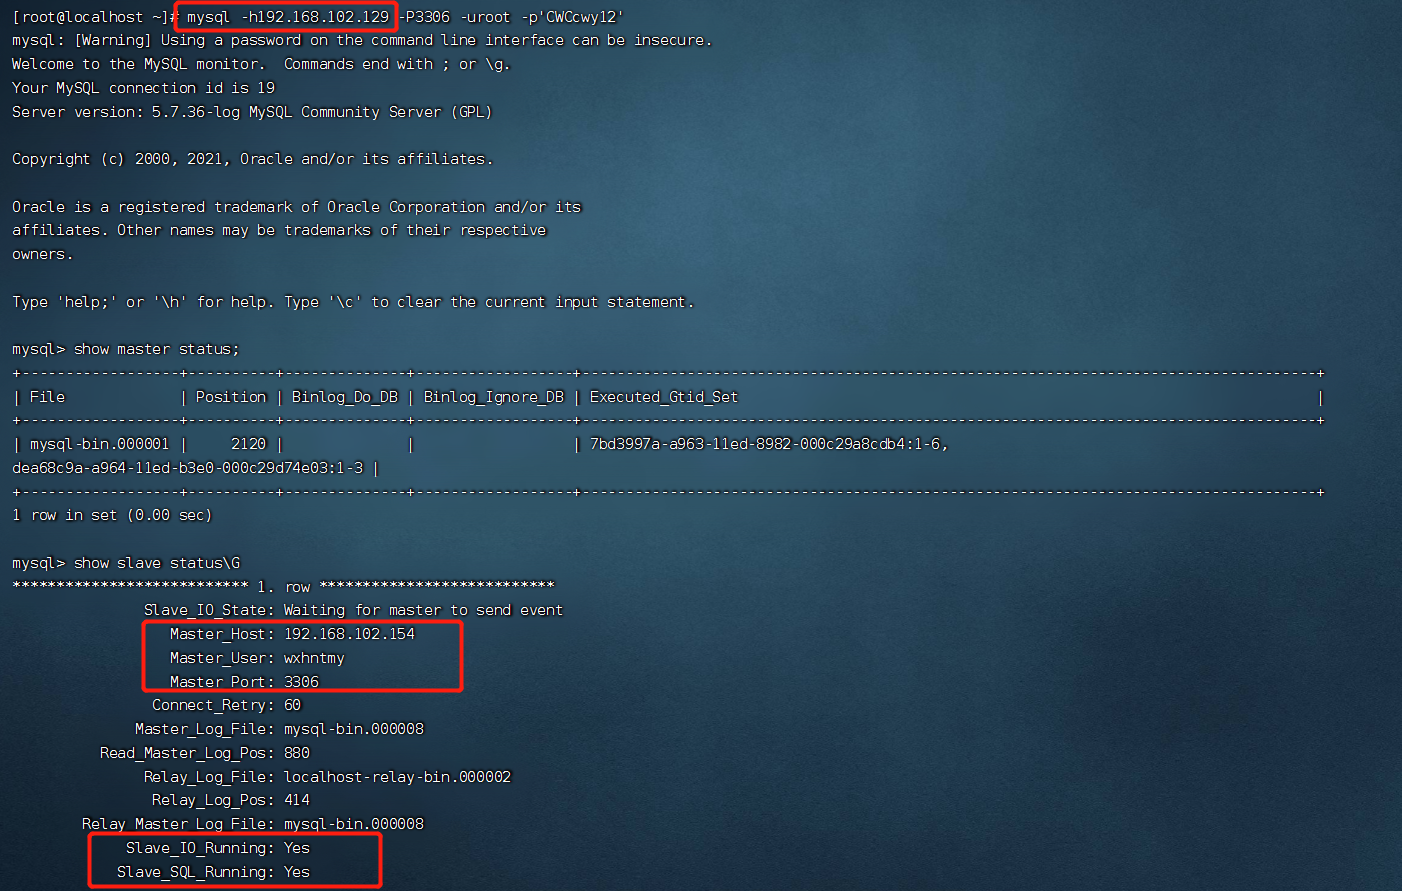
登录 Slave 1 查看
mysql -h192.168.102.129 -P3306 -uroot -p'CWCcwy12'
show master status;
show slave status\G
登录 Slave 2 查看
mysql -h192.168.102.110 -P3306 -uroot -p'CWCcwy12'
show master status;
show slave status\G
好